CORGI
268 1967 - 1972 |
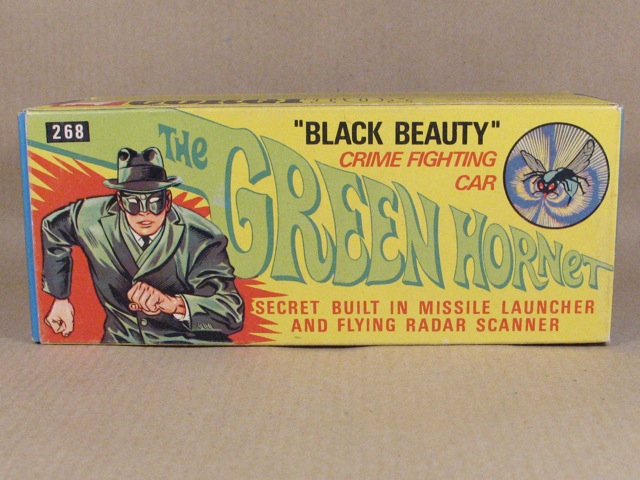
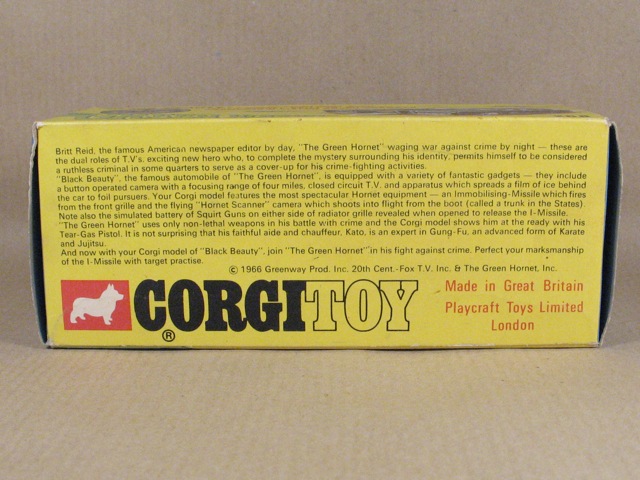
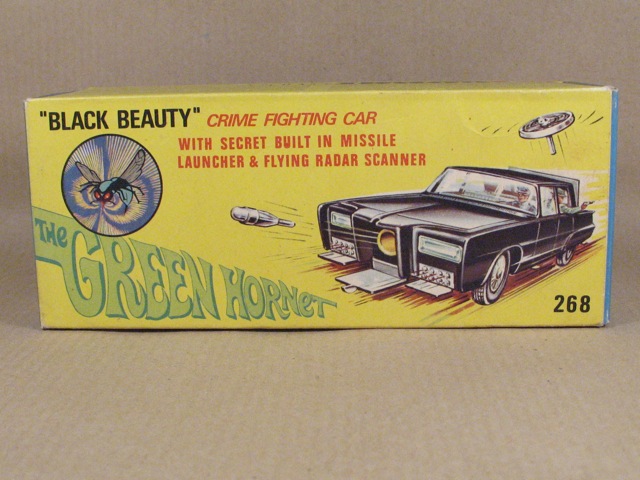
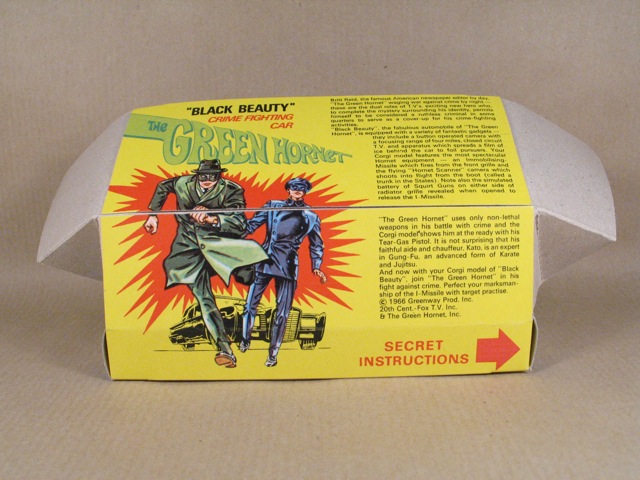
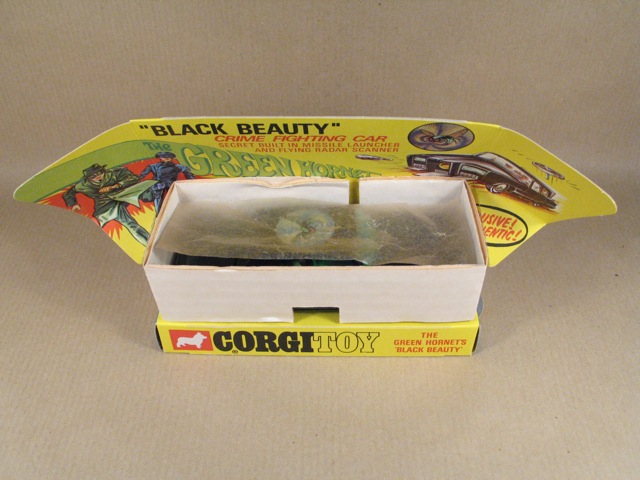
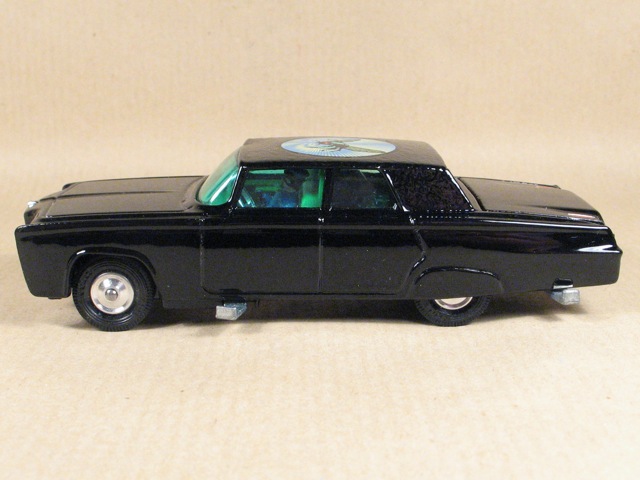
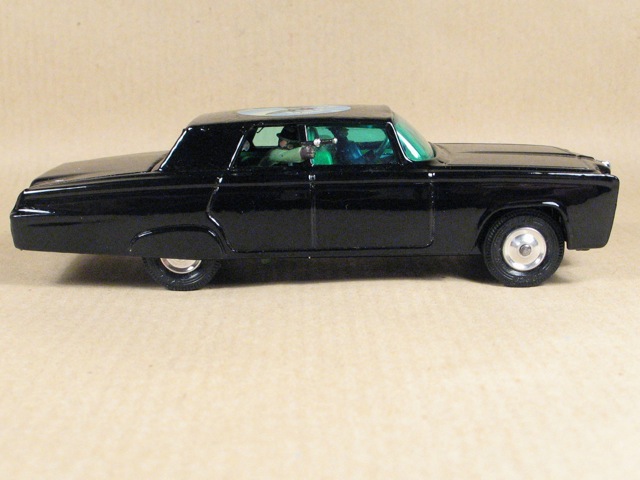
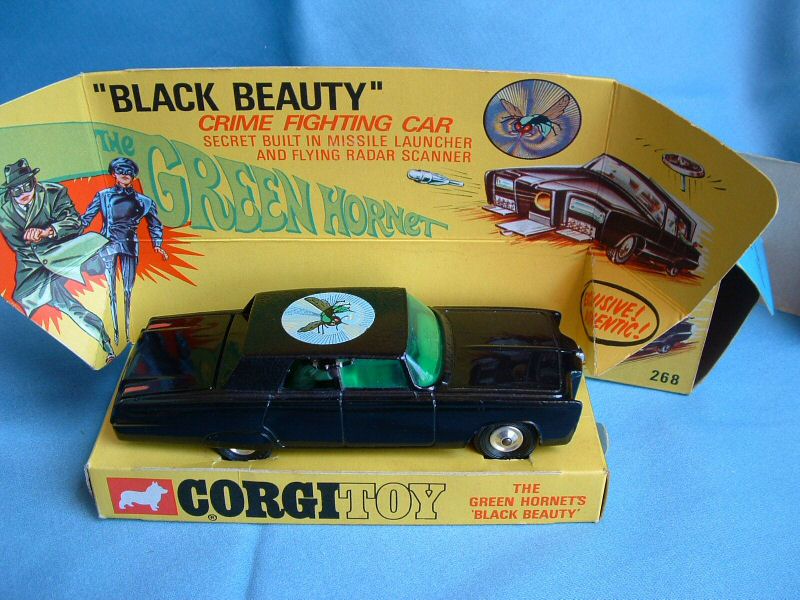
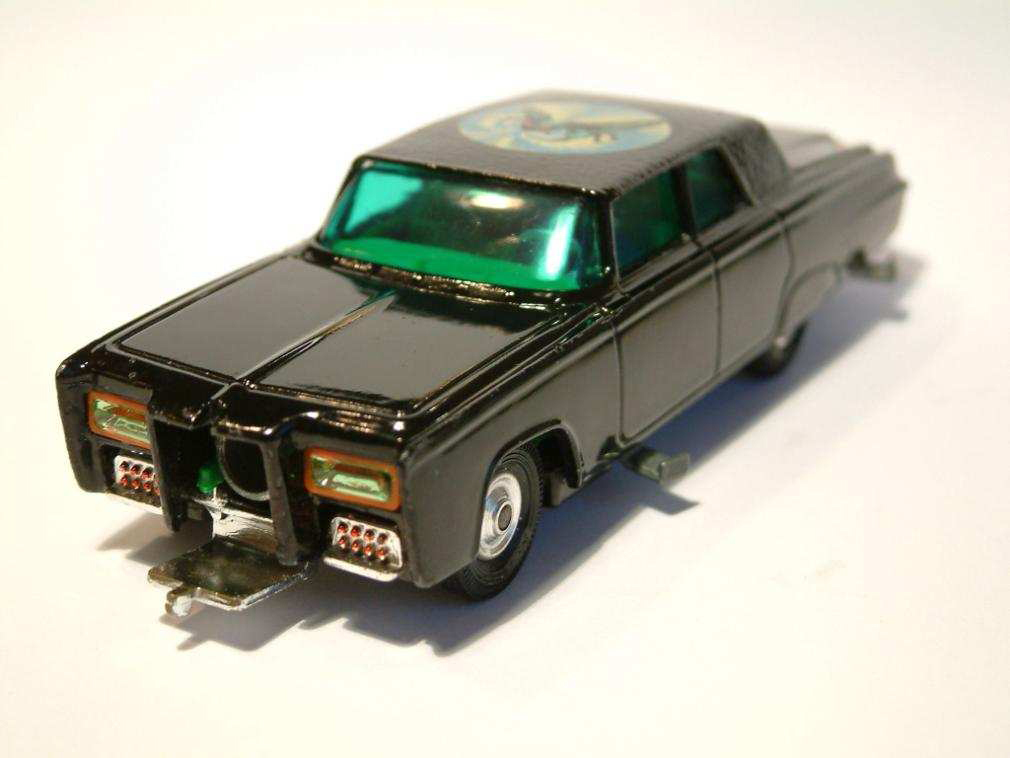
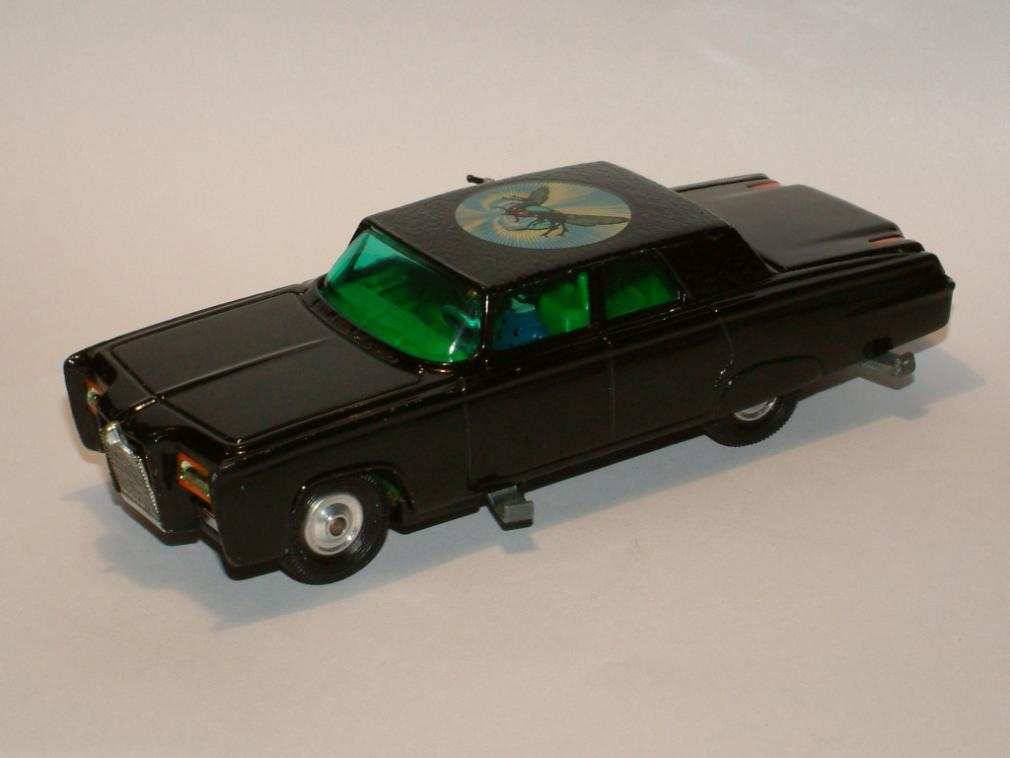
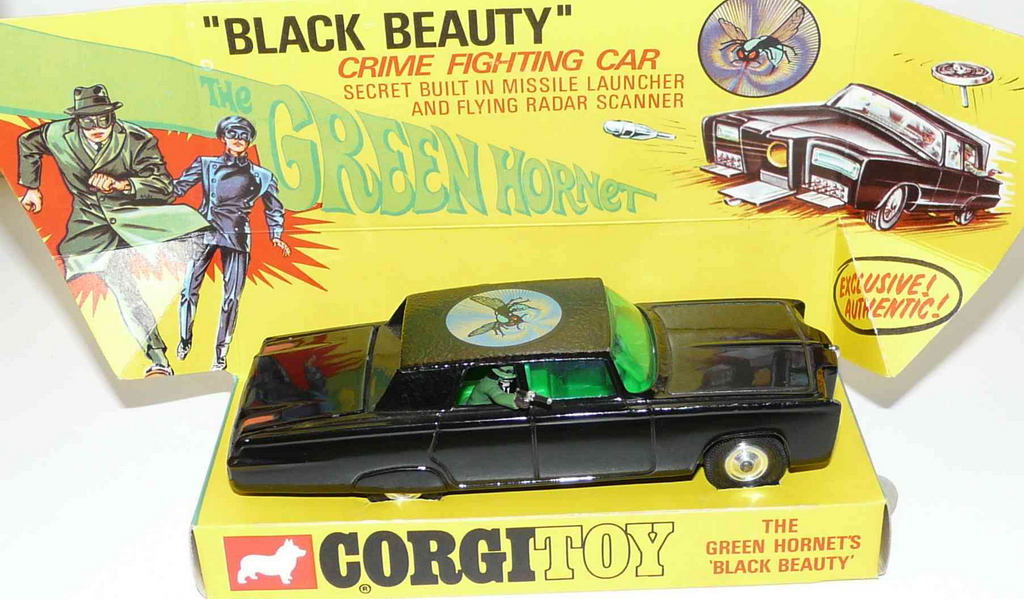
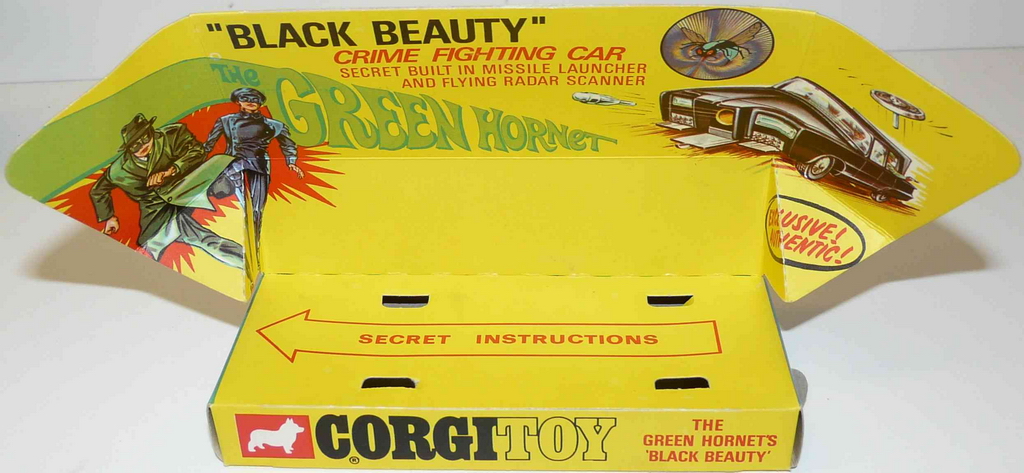
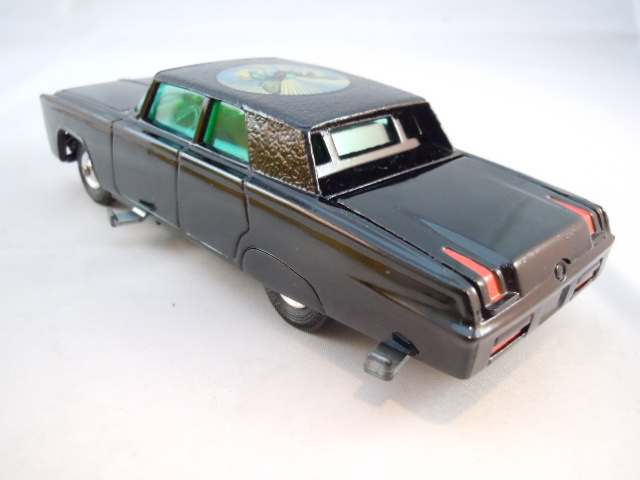
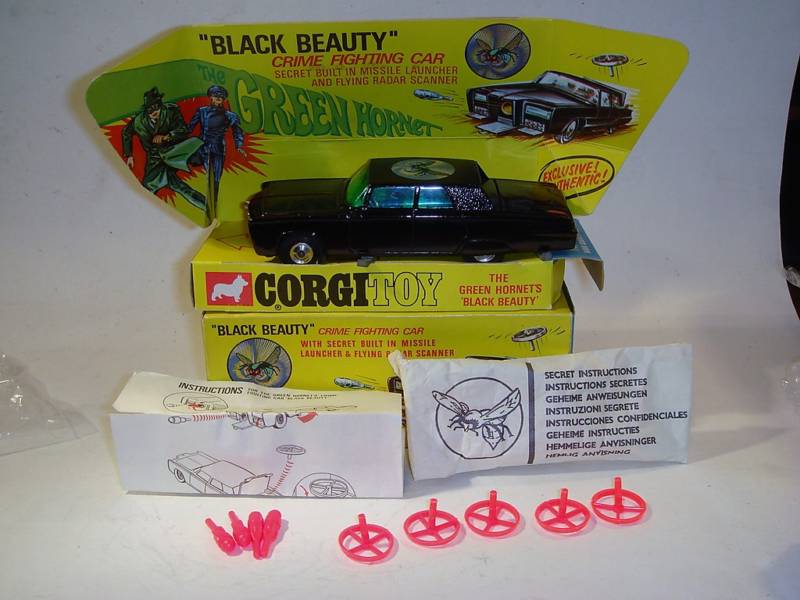
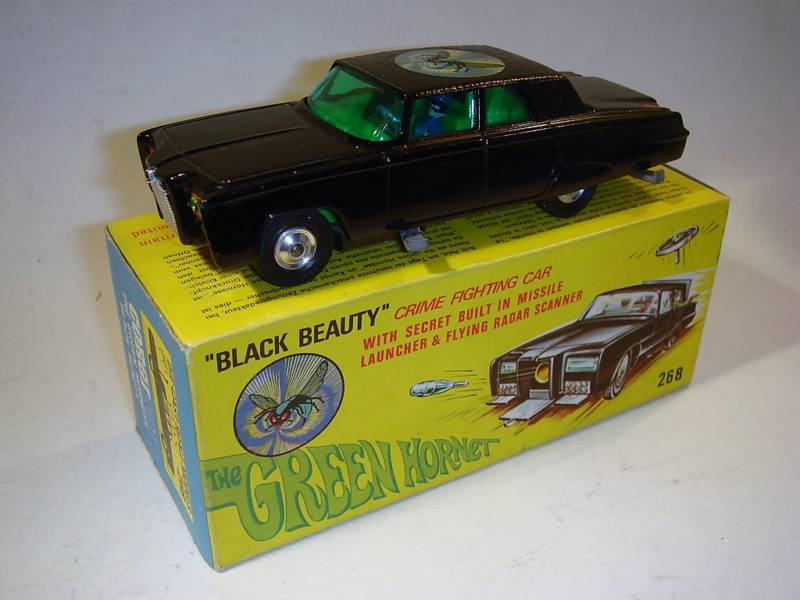
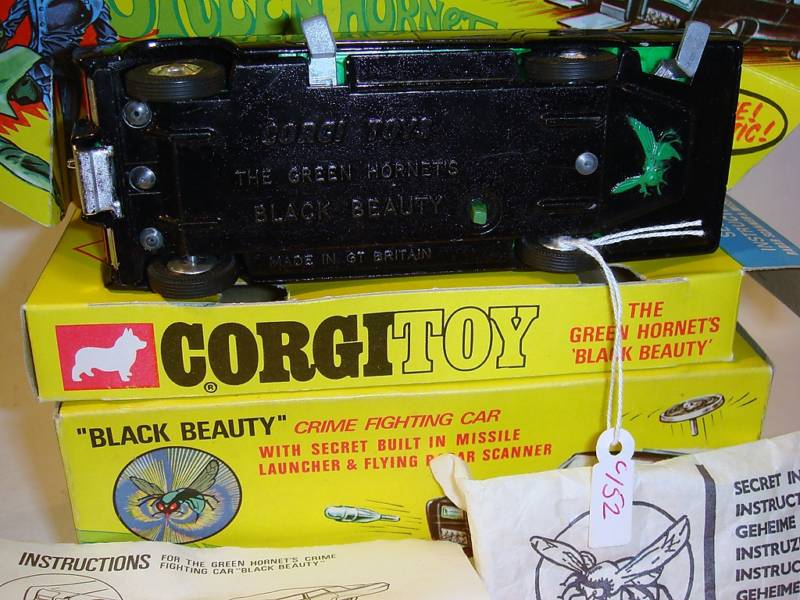
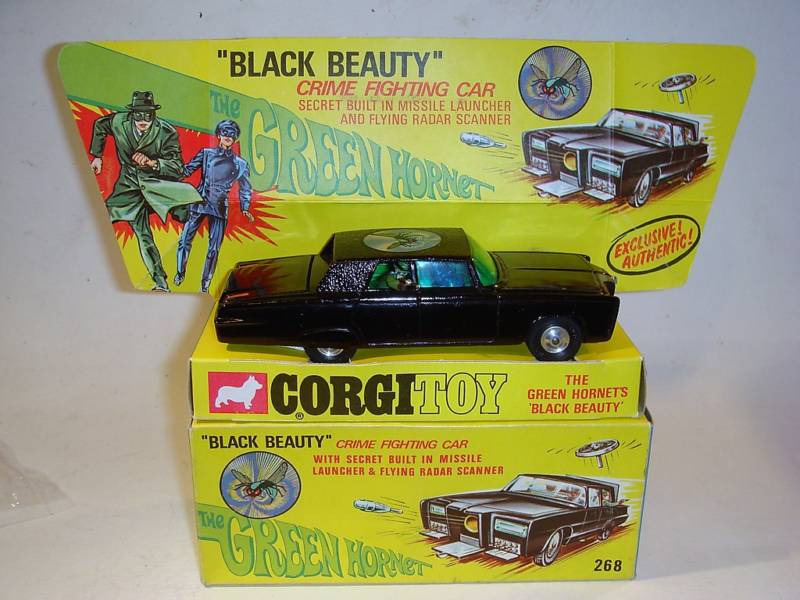
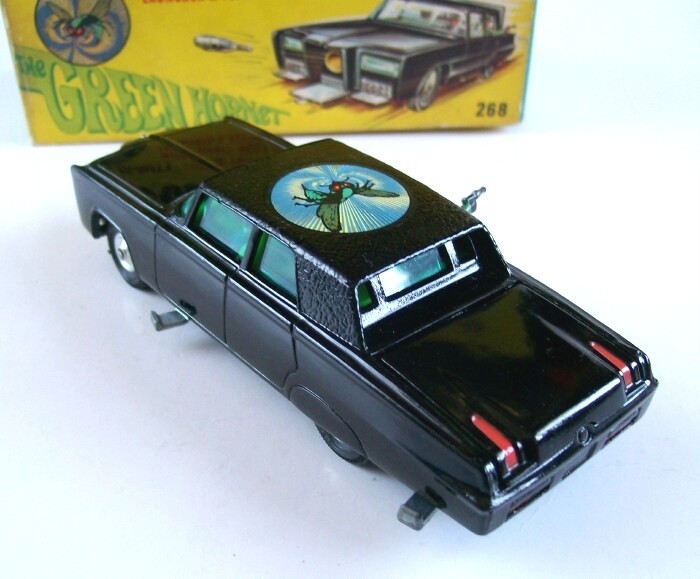
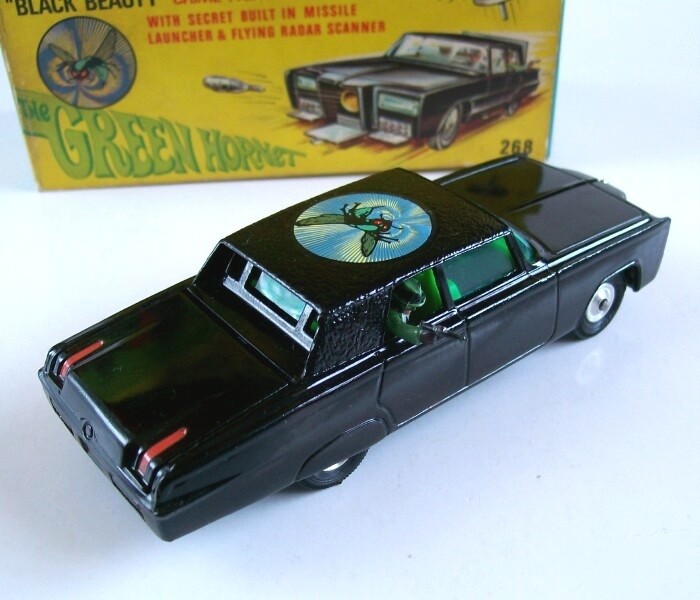
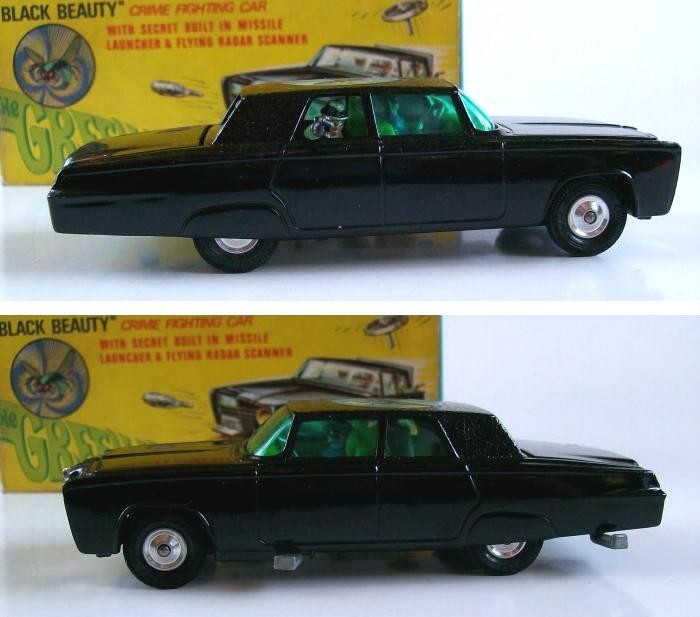
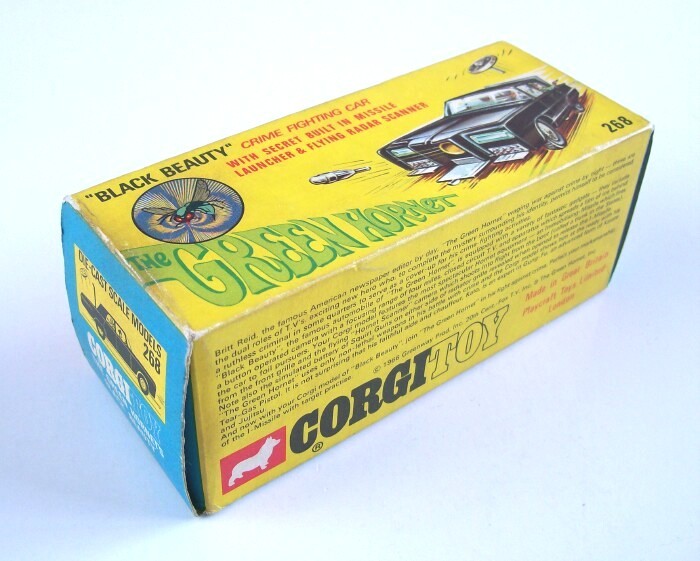
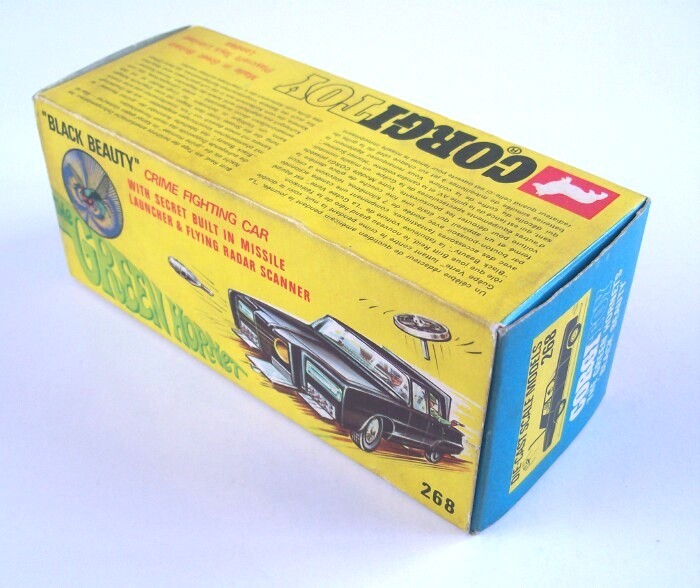
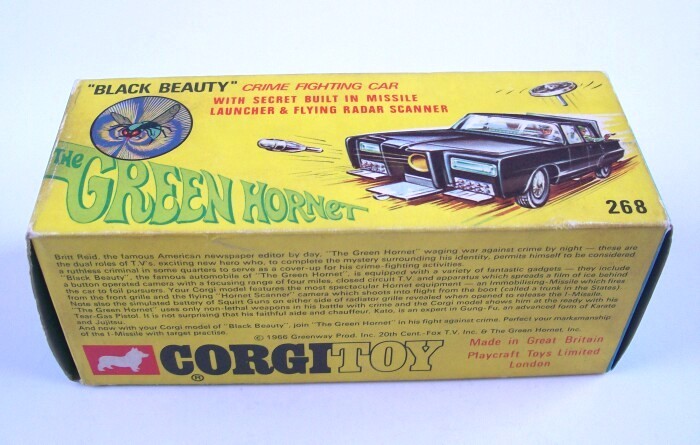
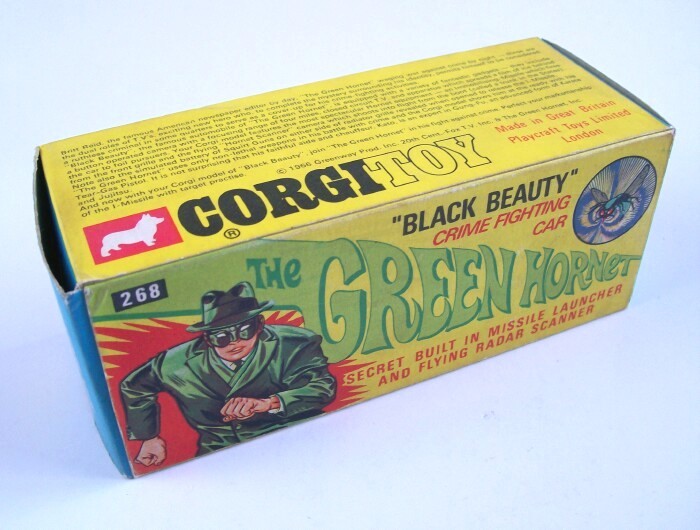
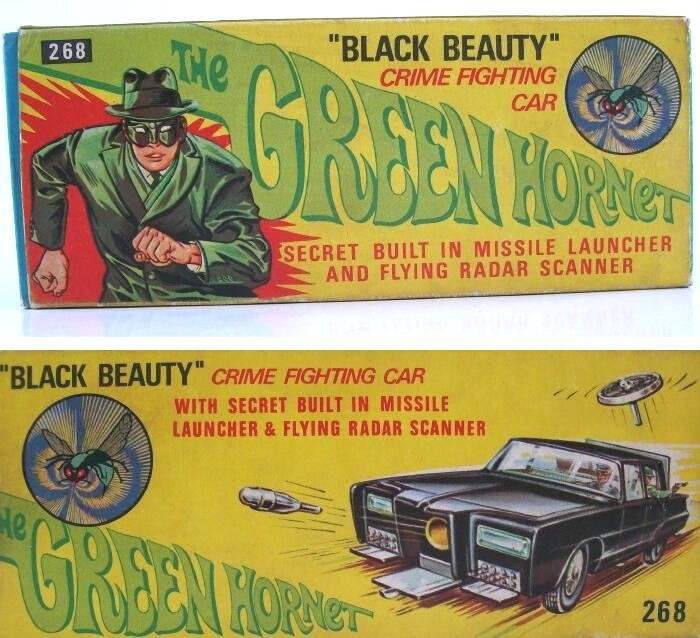
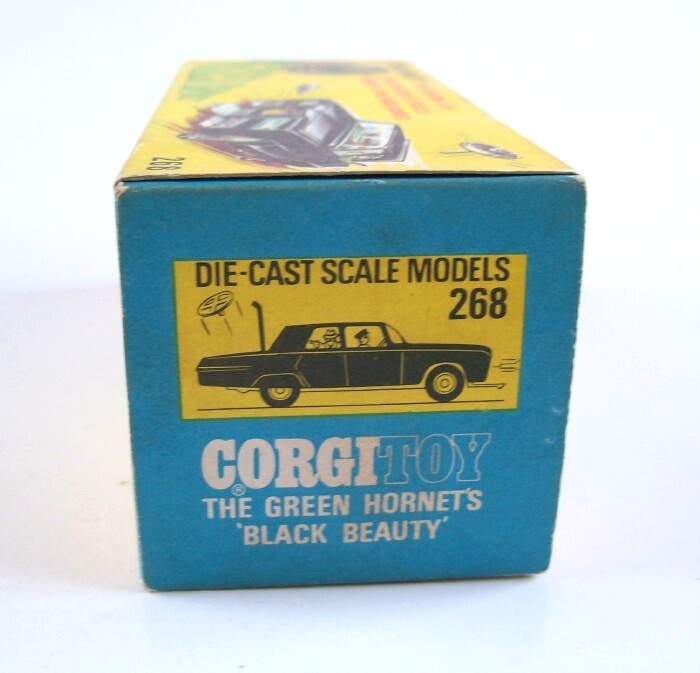
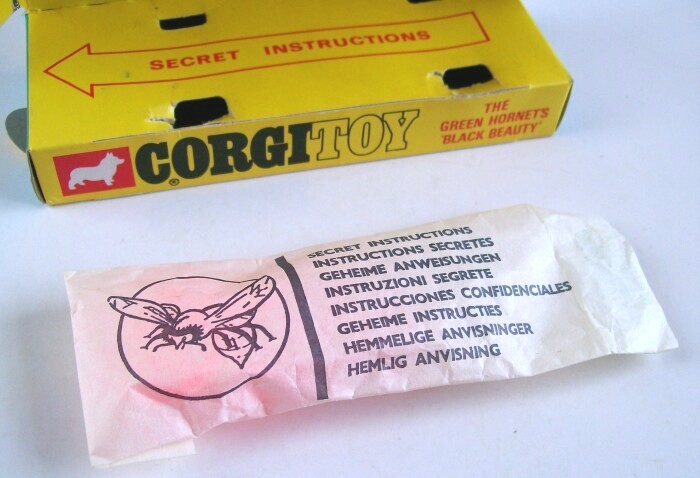
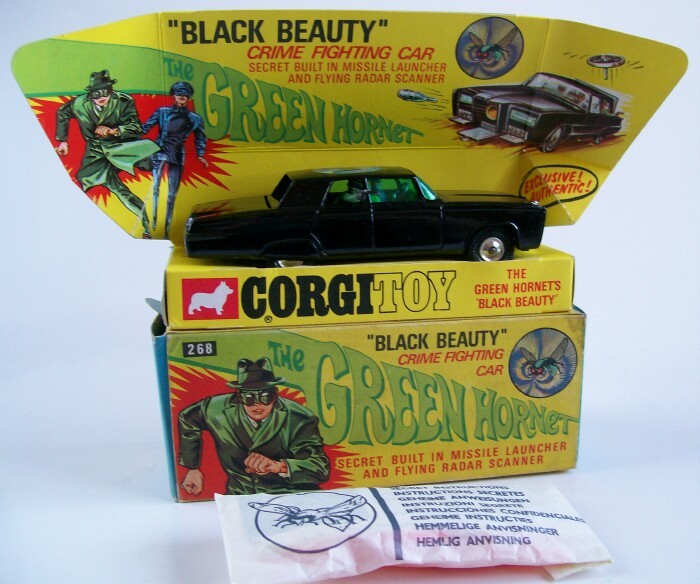
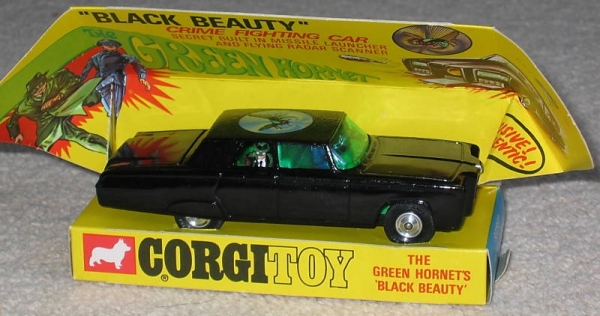
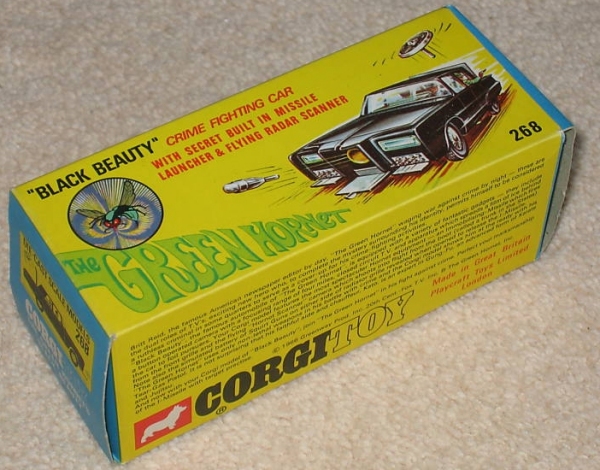
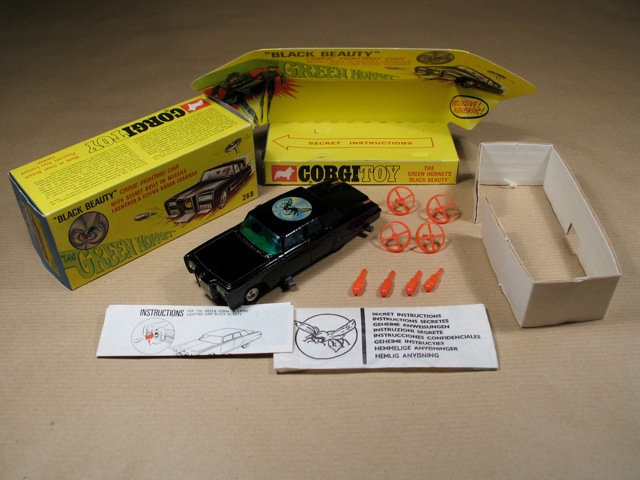
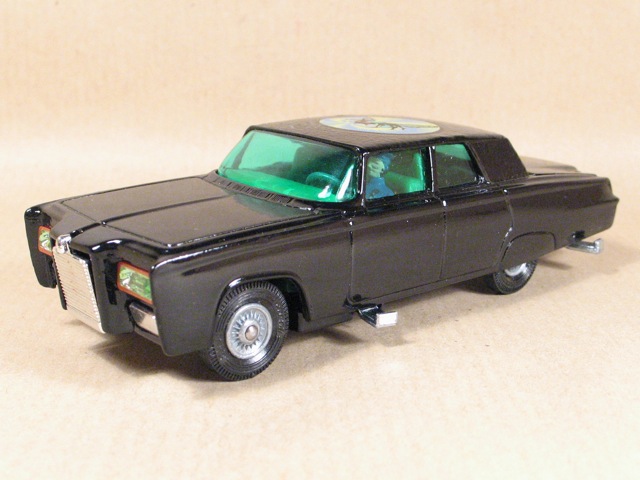
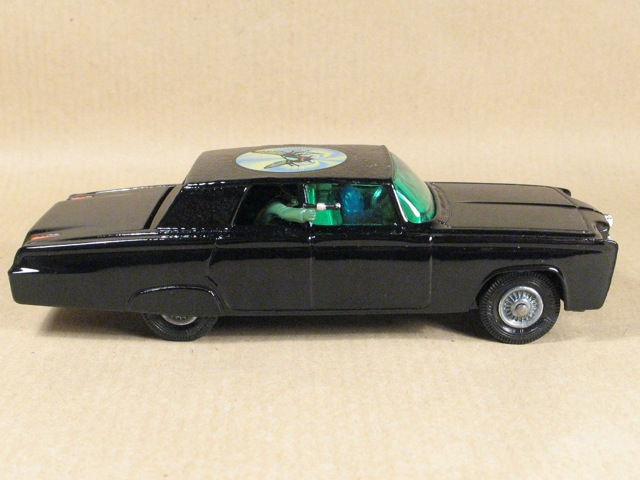
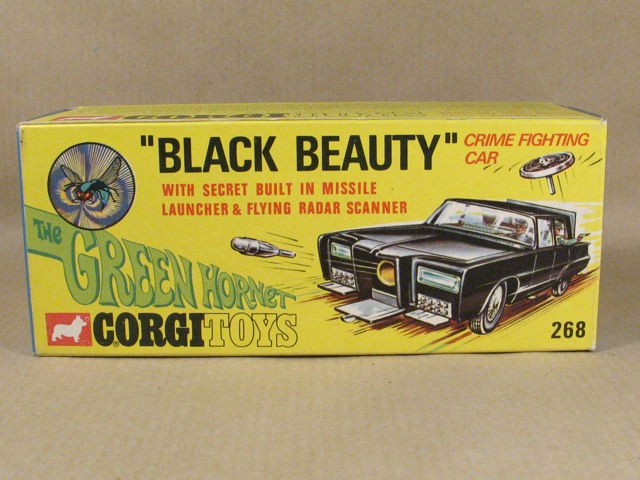
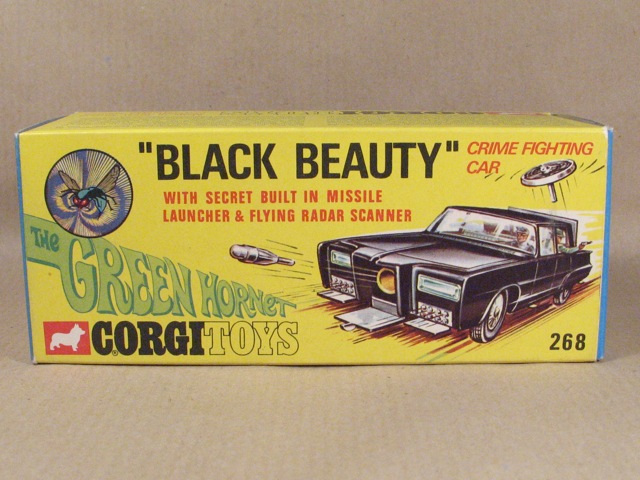
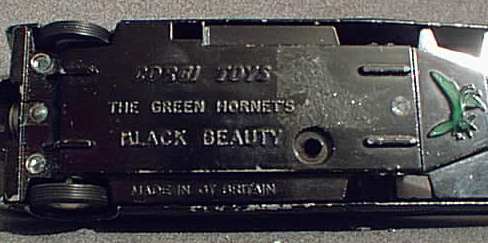
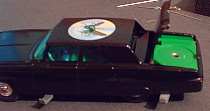
Corgi TOYS NUMBER 268 - THE GREEN HORNET's BLACK BEAUTY CRIME FIGHTING CAR - 1967 - WITH AN ORIGINAL MISSILE AND SCANNER
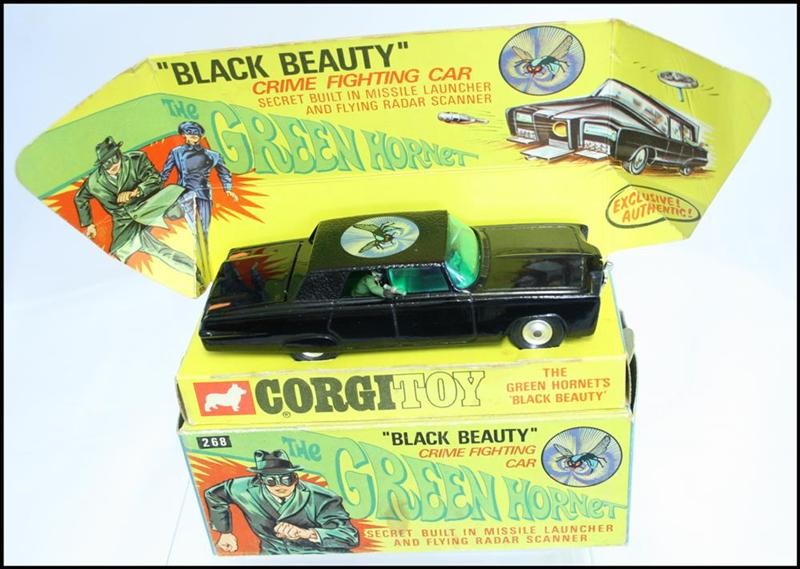 |
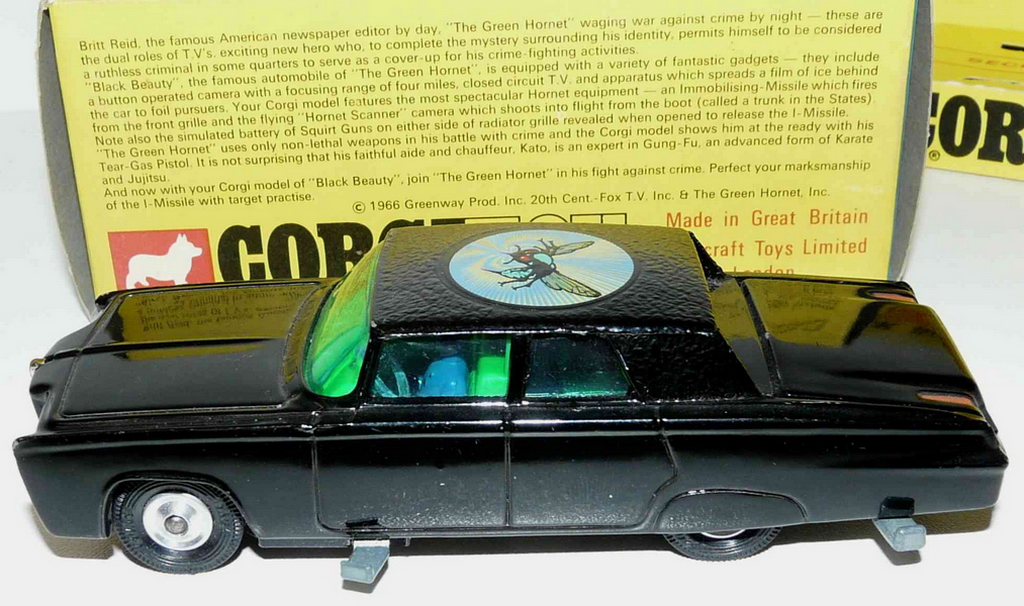
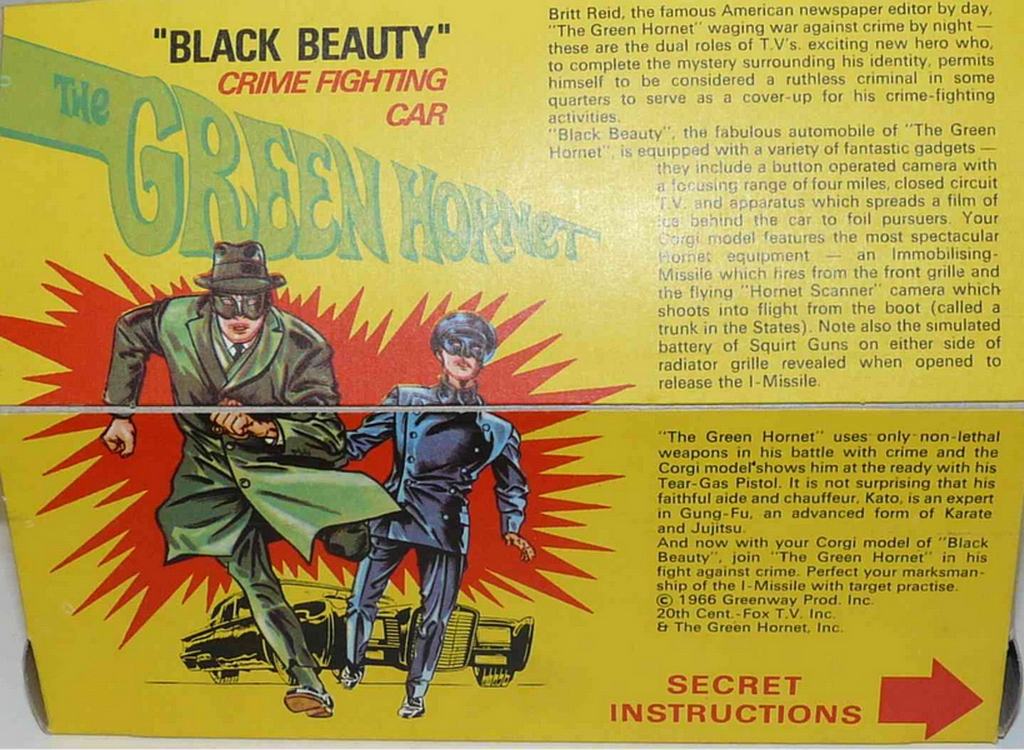
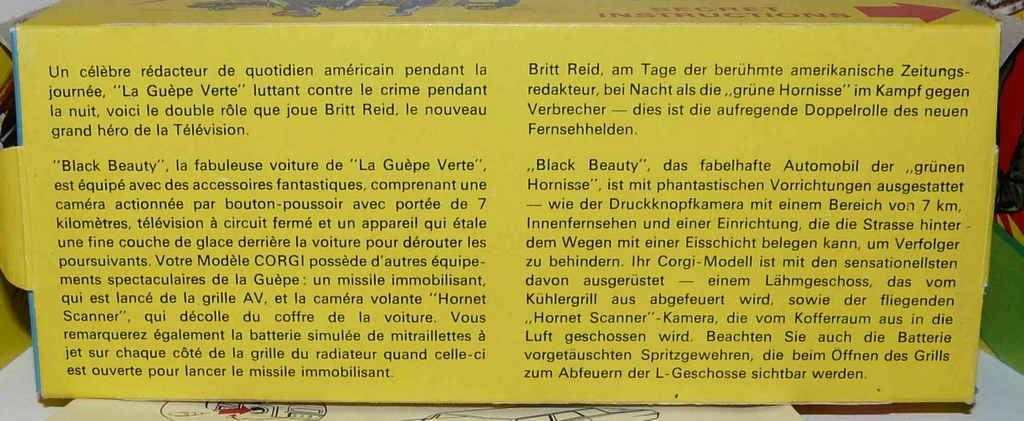
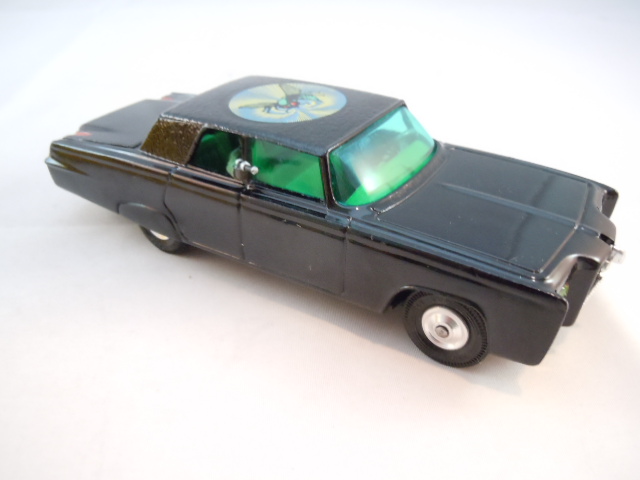
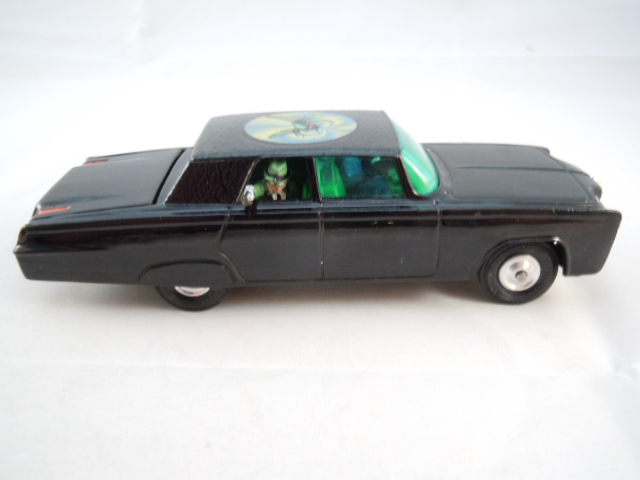
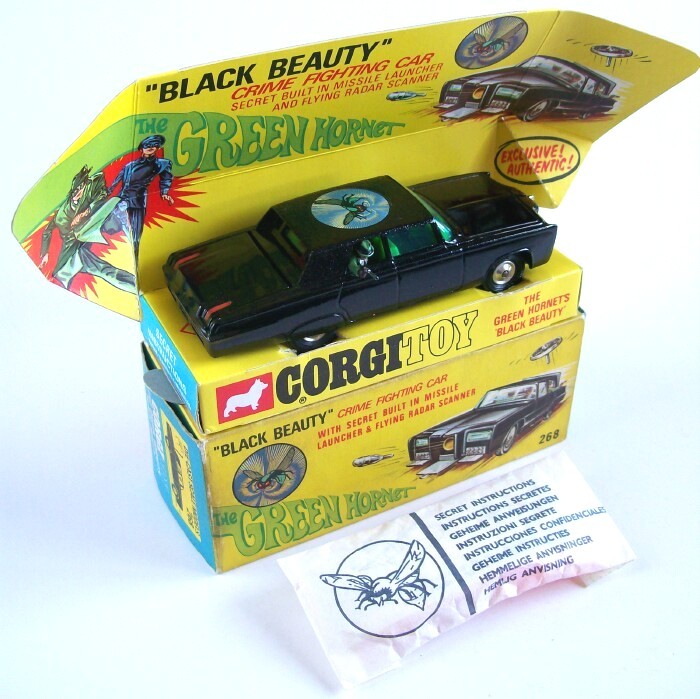
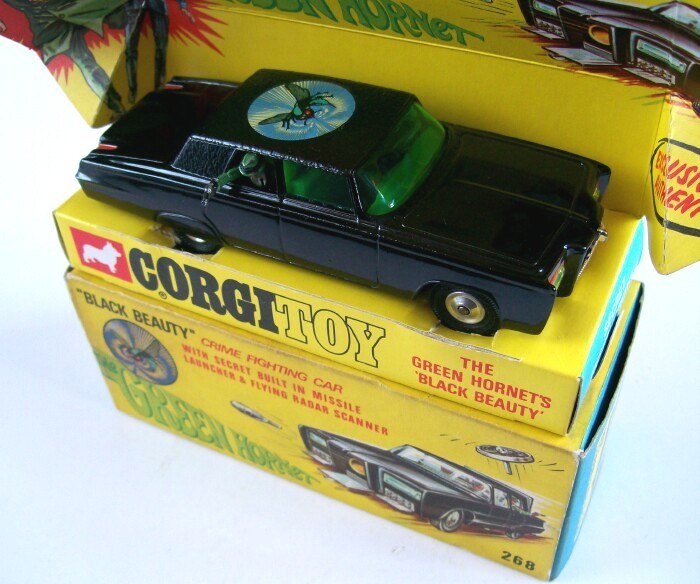
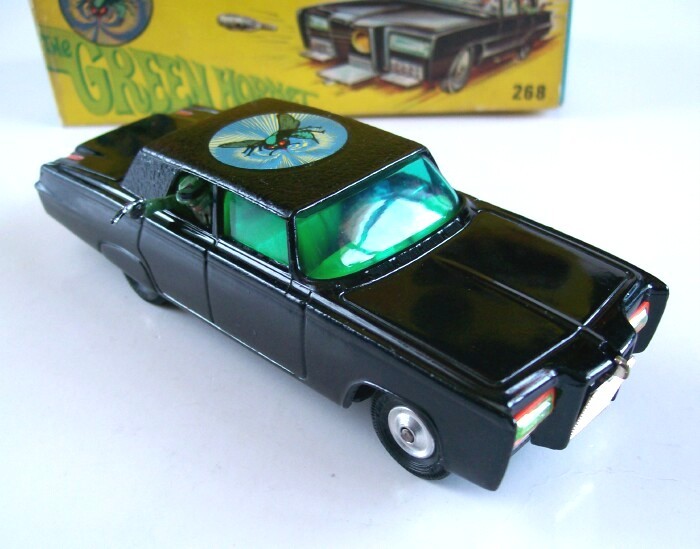
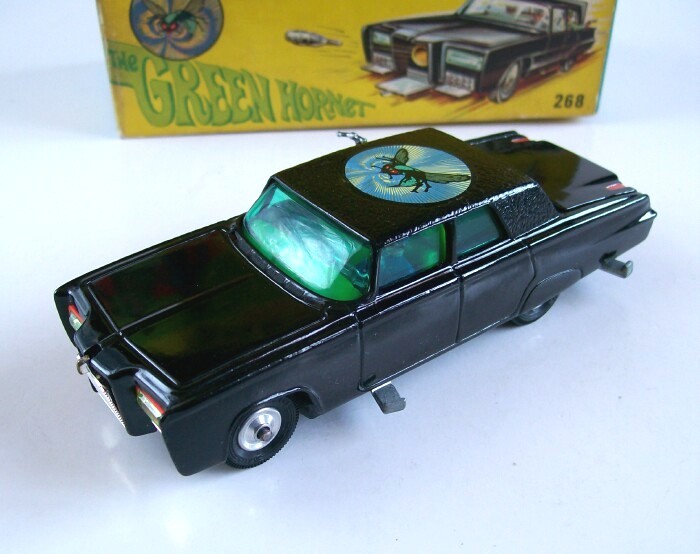
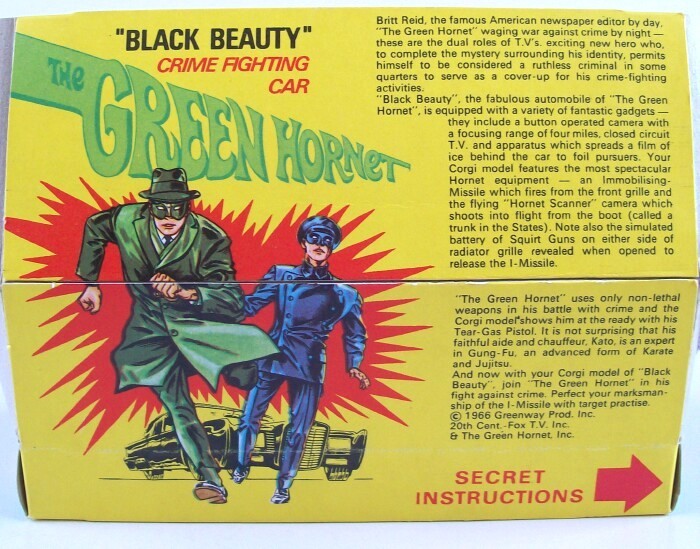
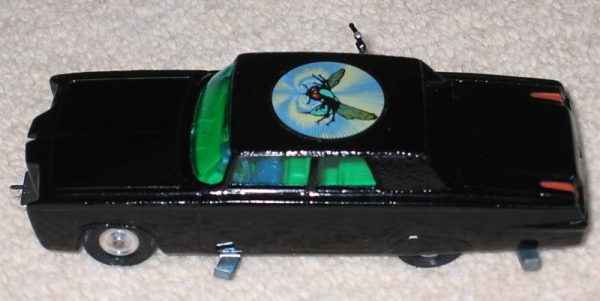
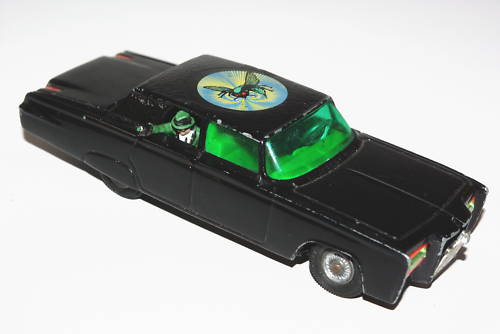
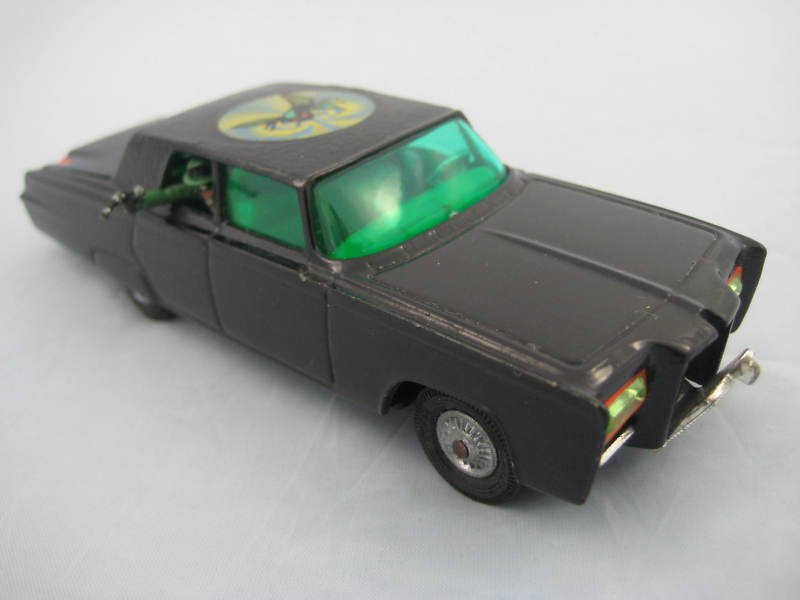
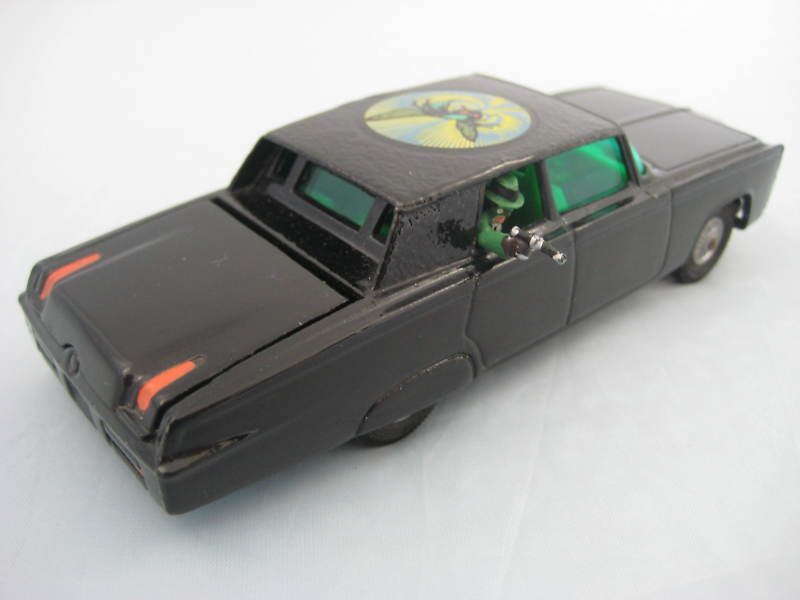
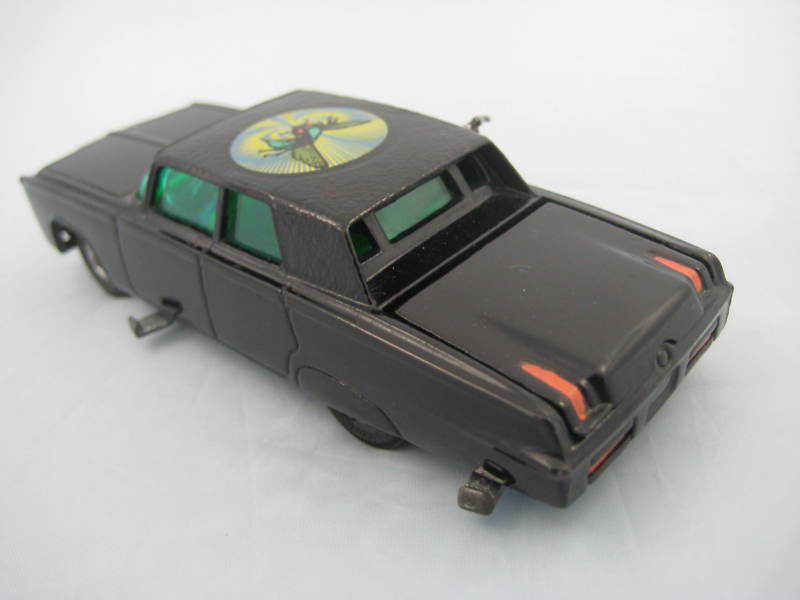
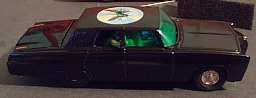
The Black Beauty was released in November 1967 and was produced until 1972. During this time over 800,000 were sold - mostly to the USA.
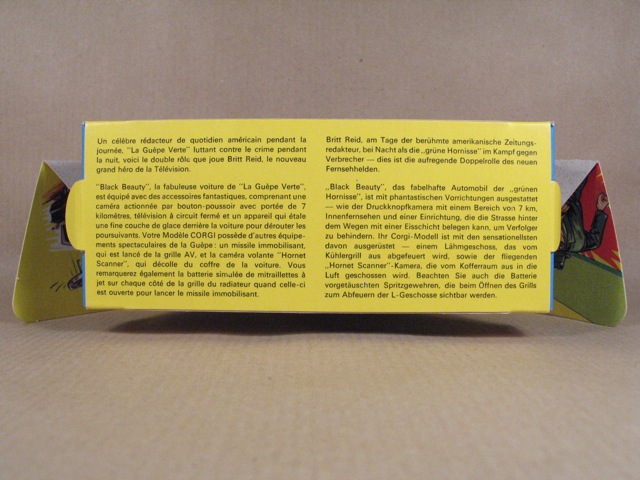
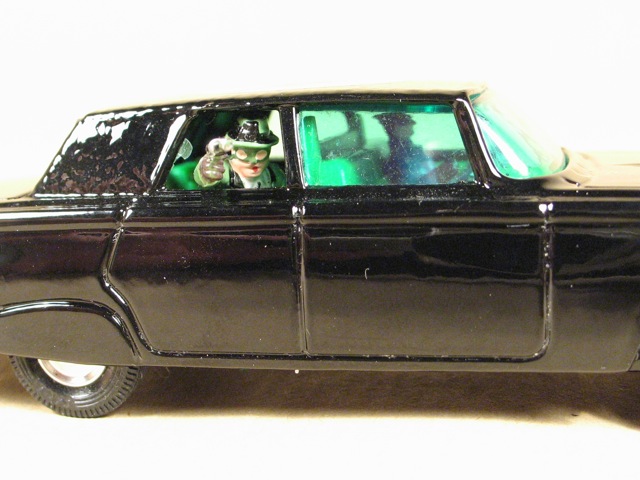
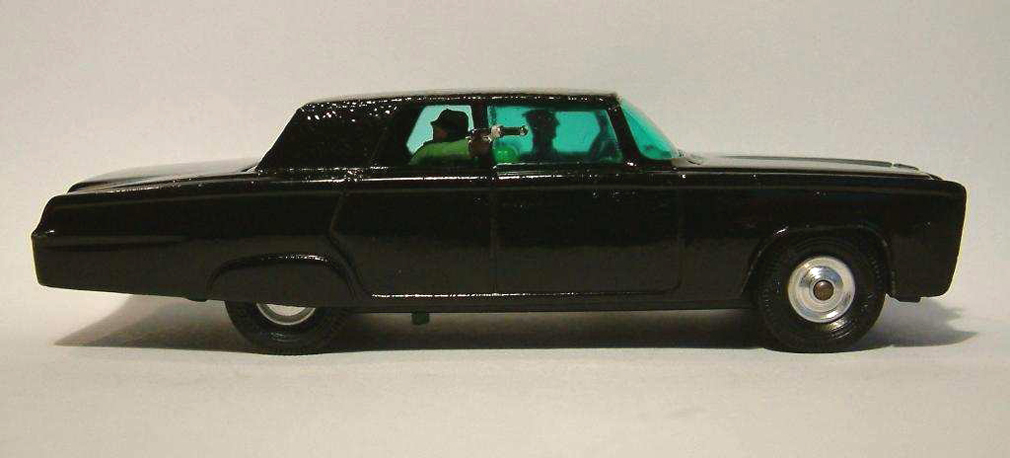
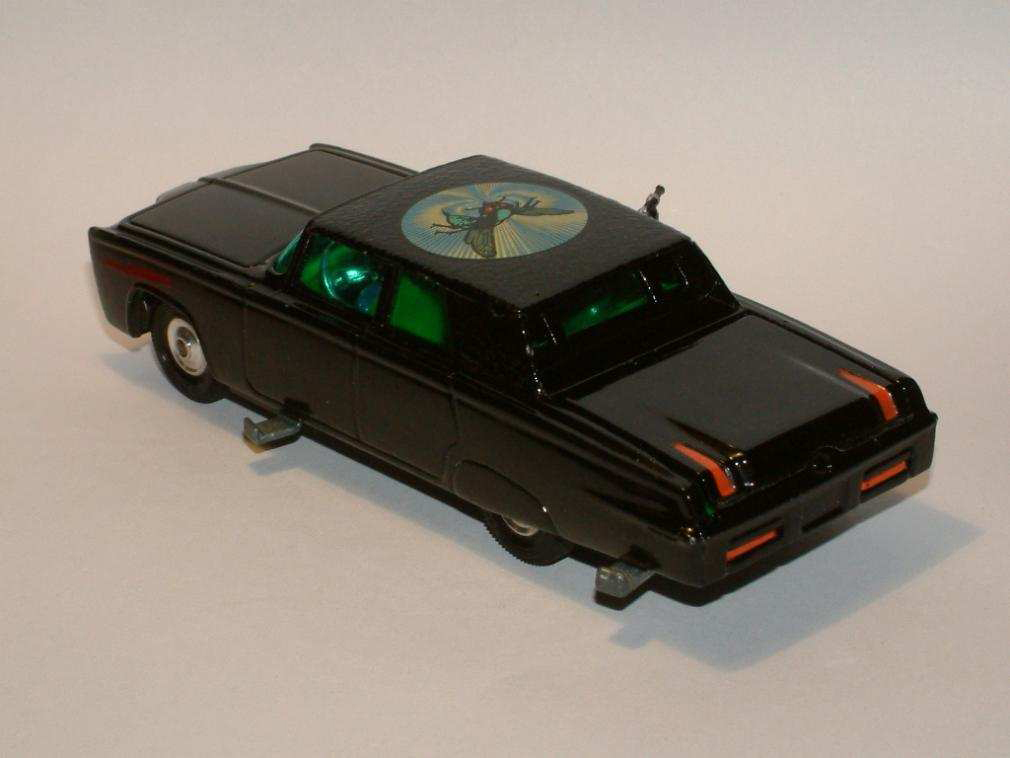
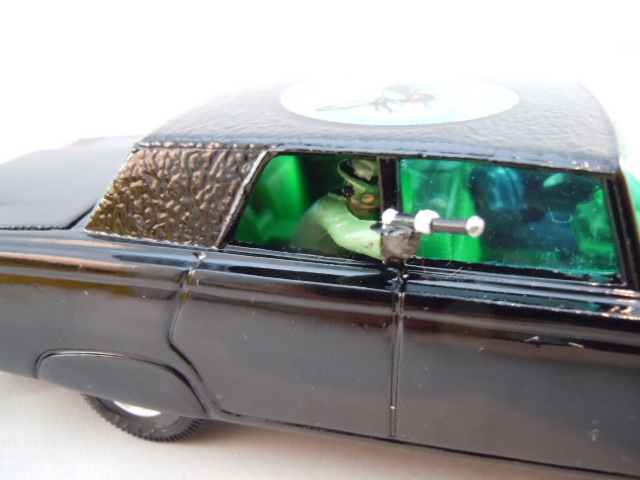
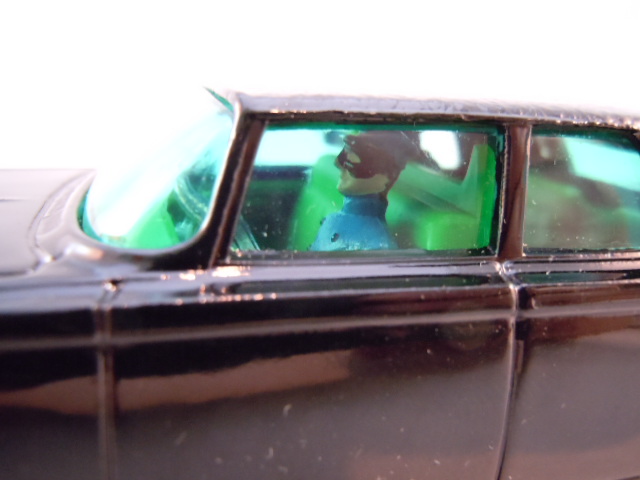
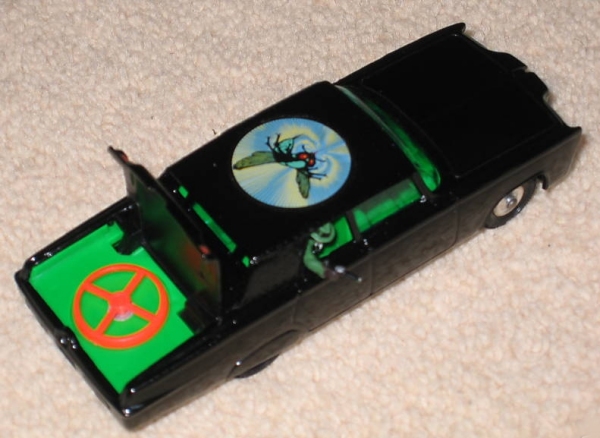
The
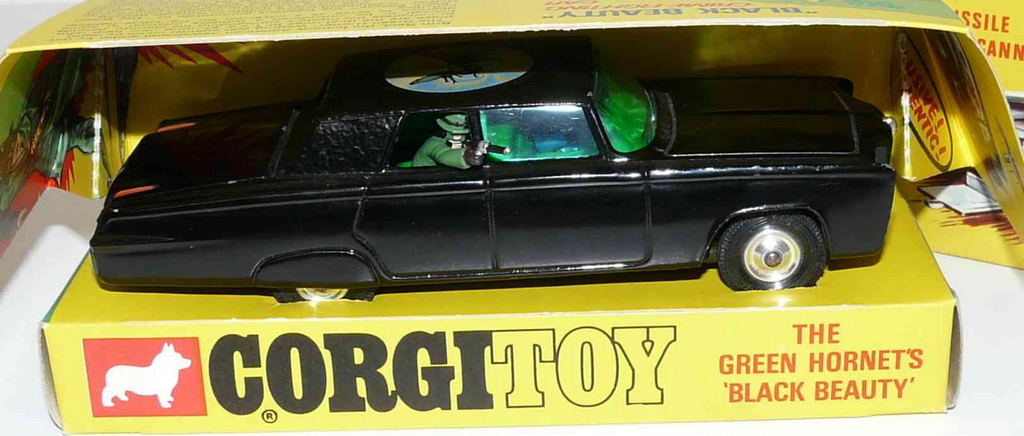
Green Hornet is in the back and his driver, Kato, at the wheel (played on
TV by Bruce Lee
and this was his first appearance on screen).
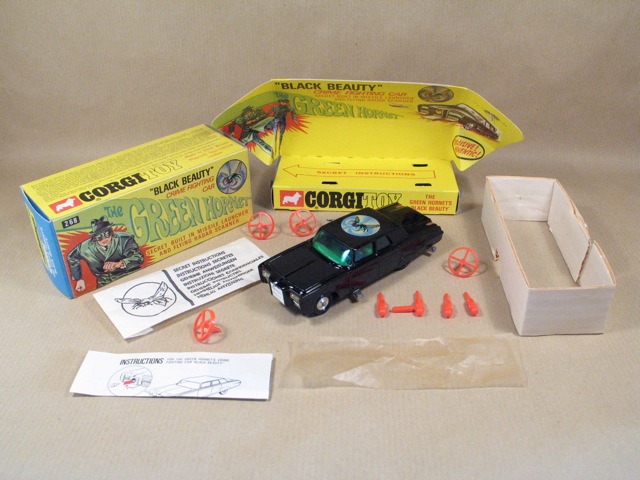
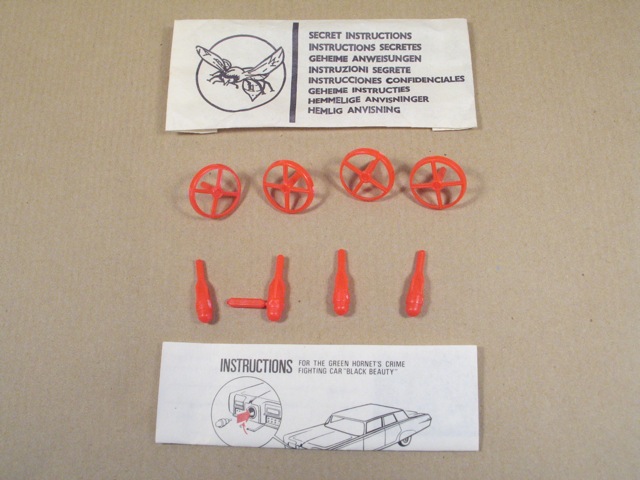
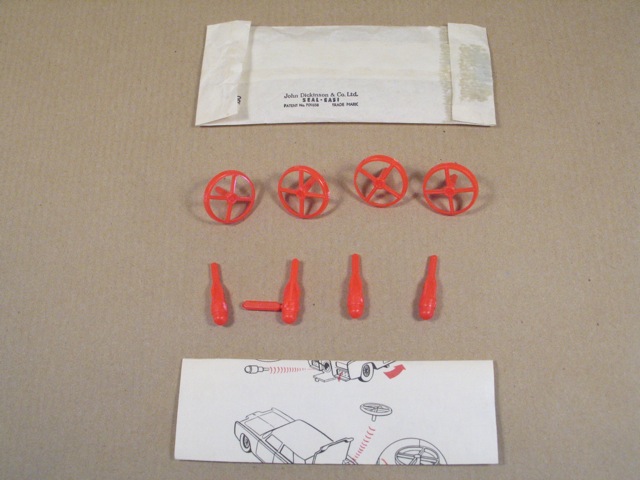
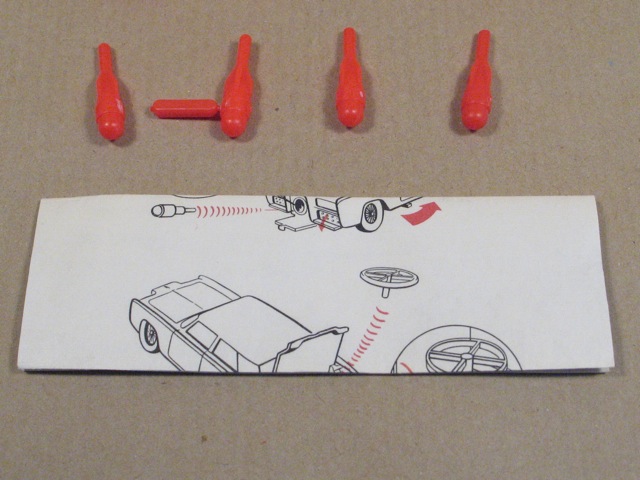
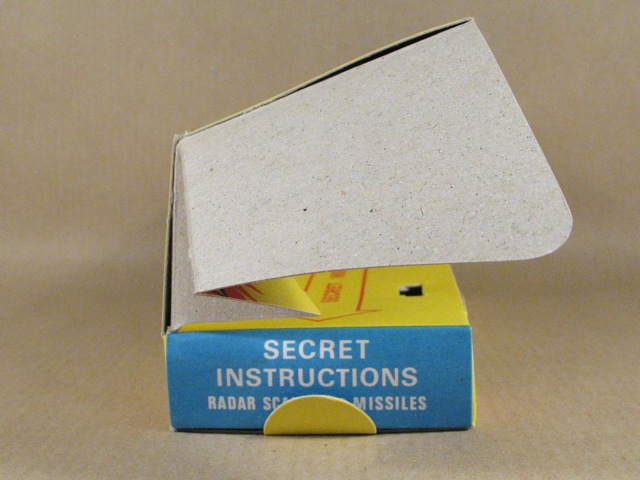
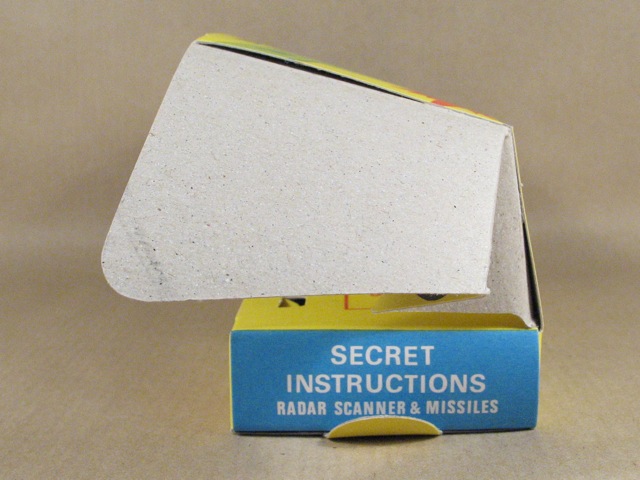
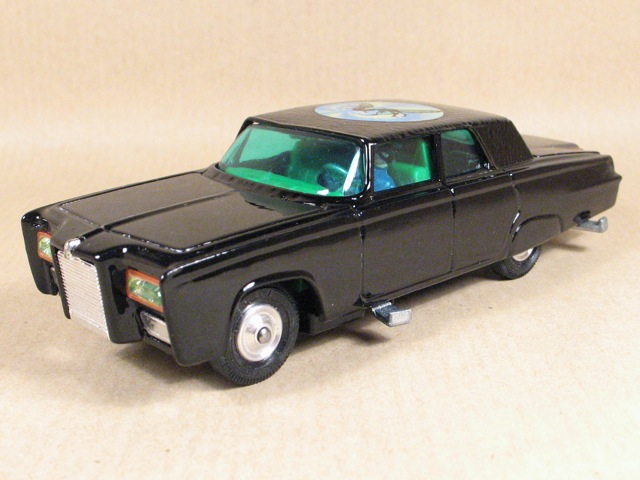
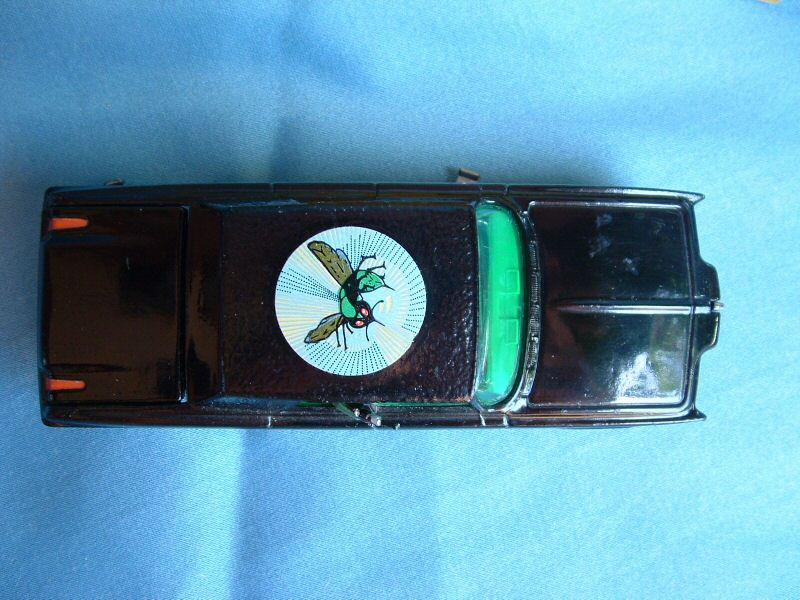
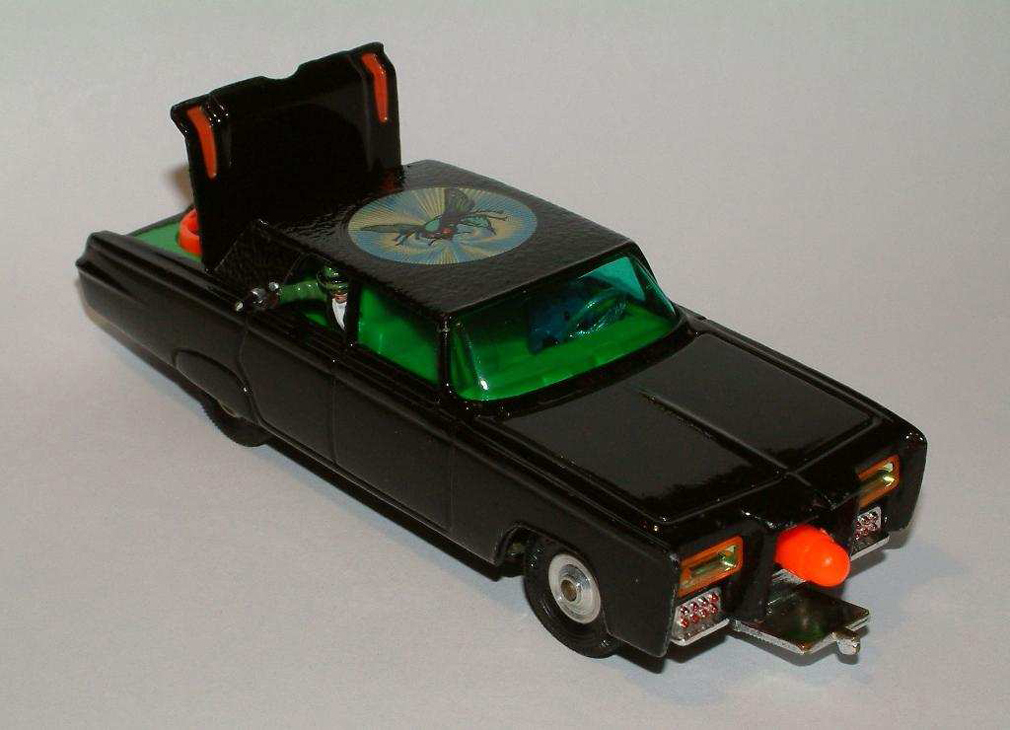
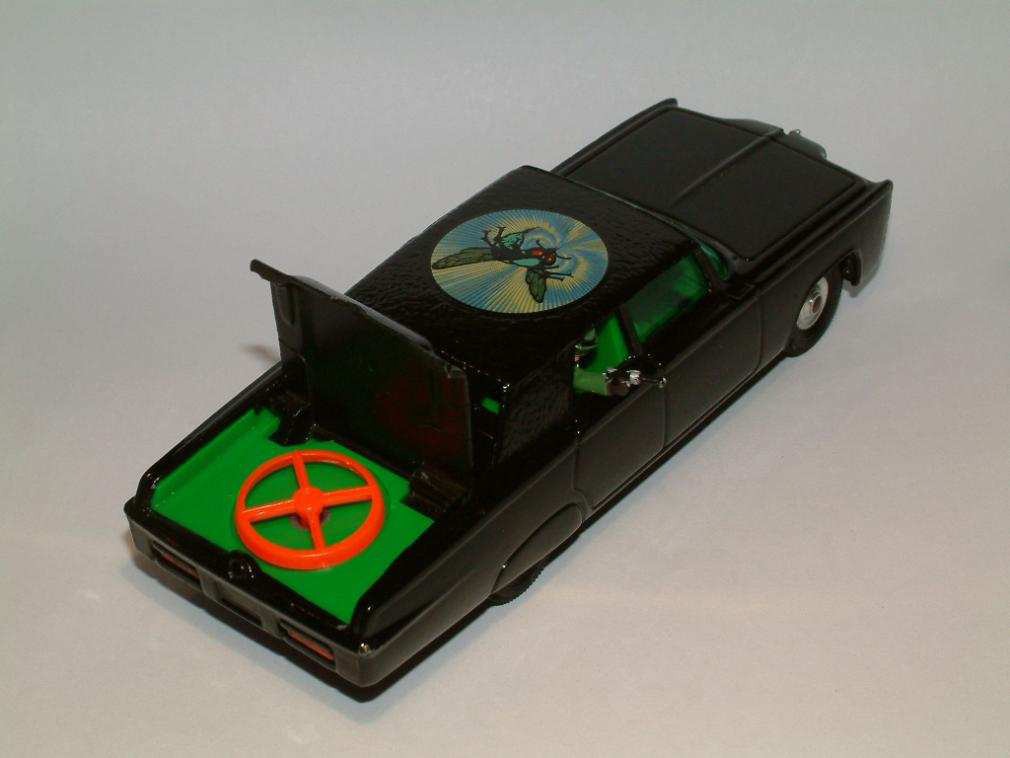
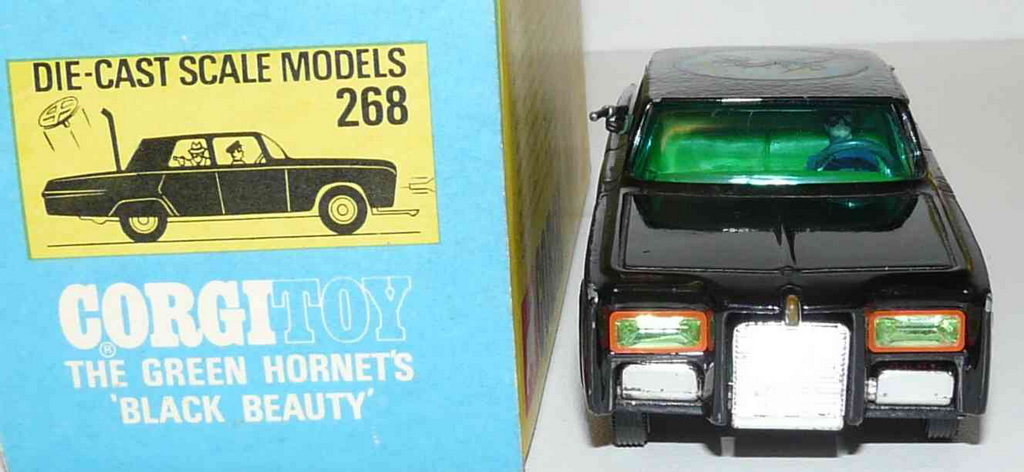
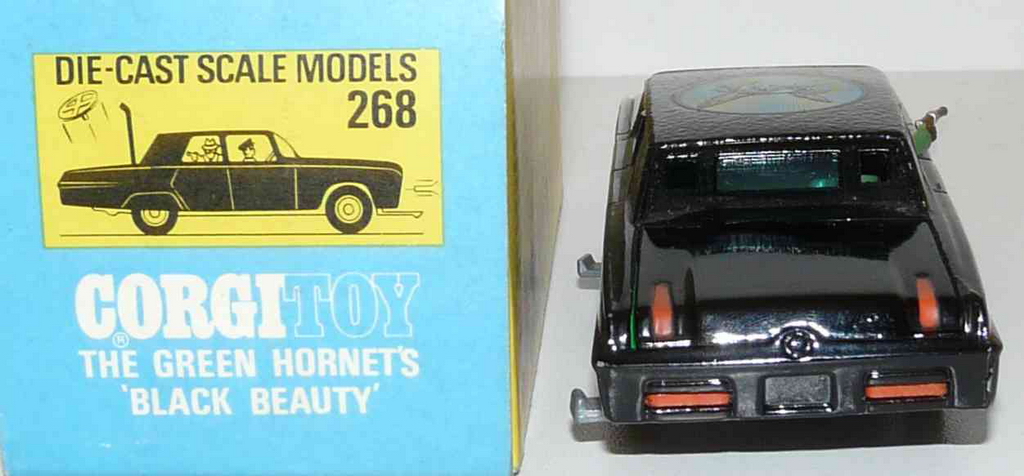
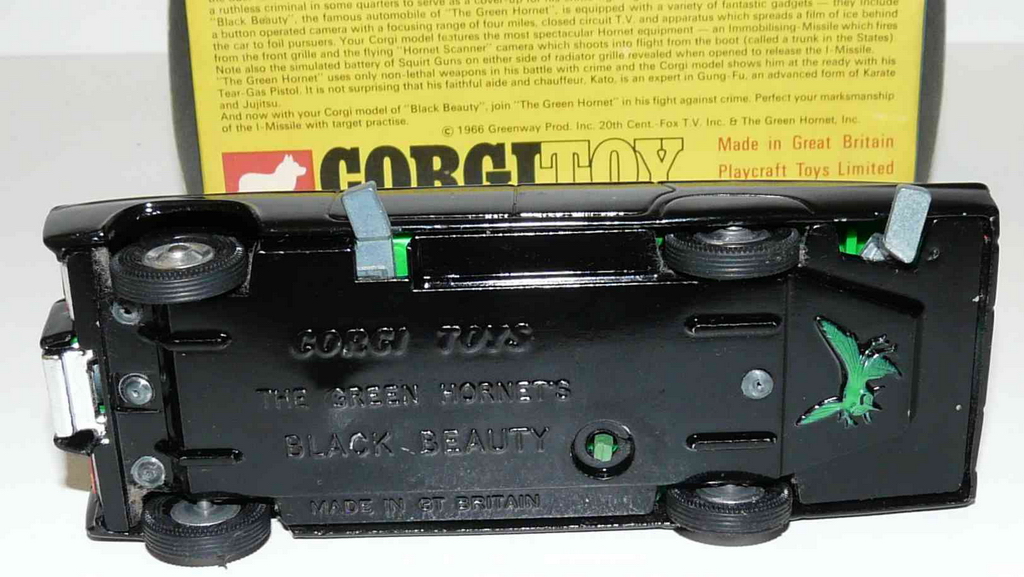
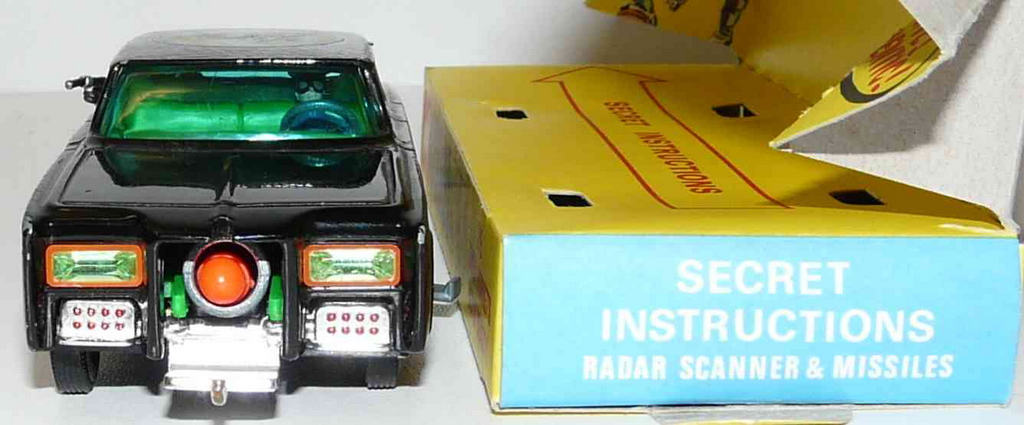
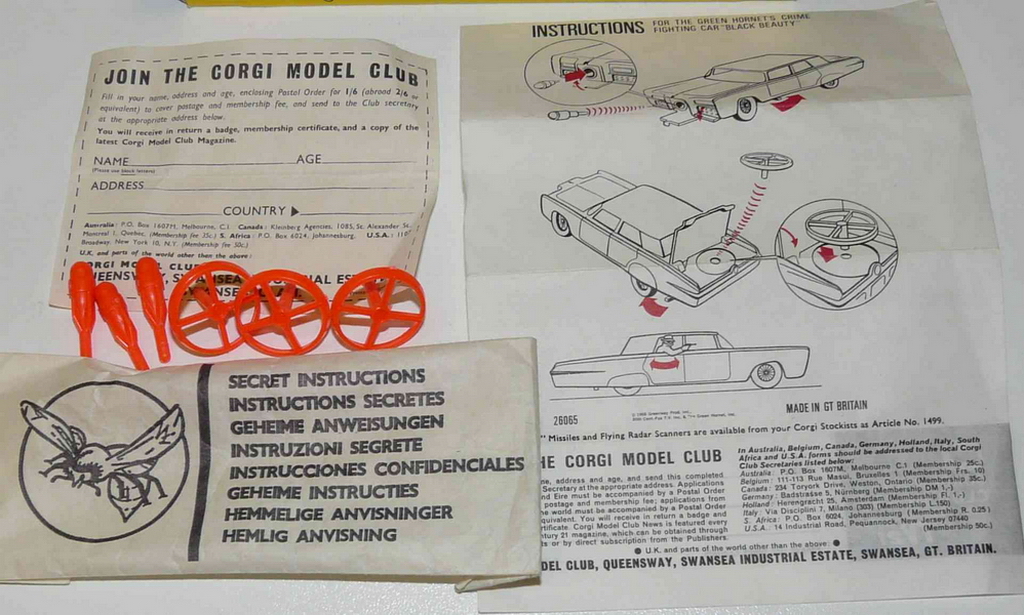
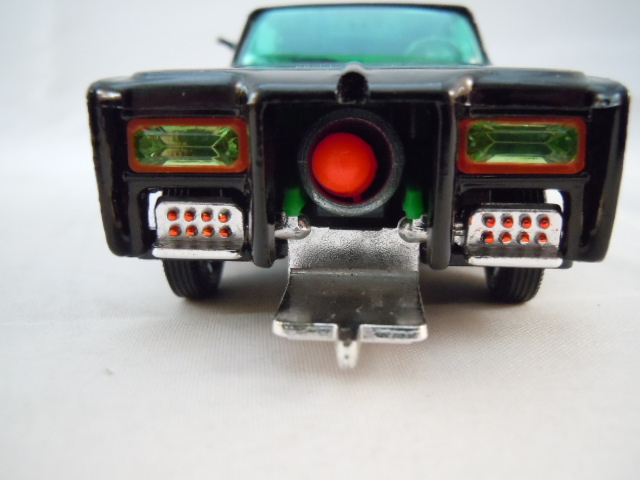
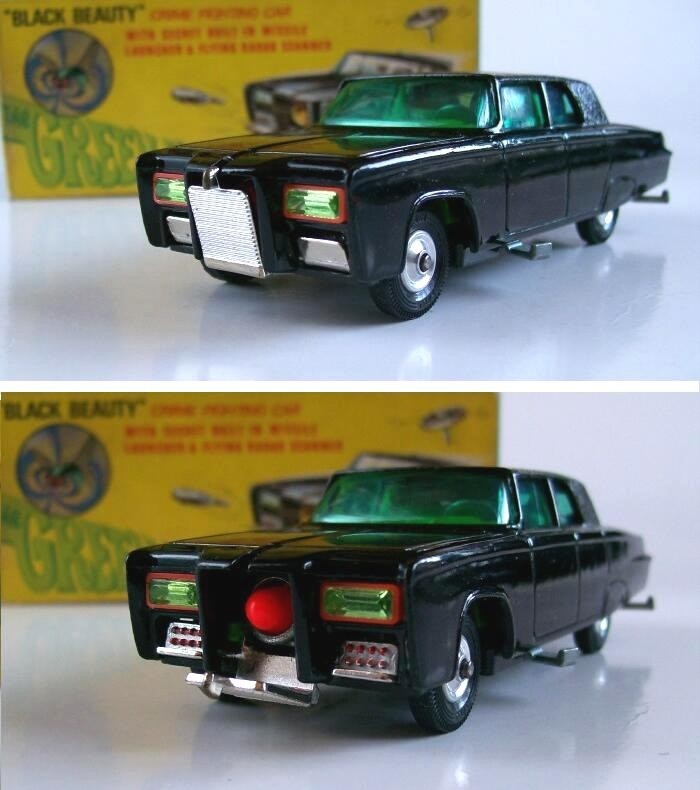
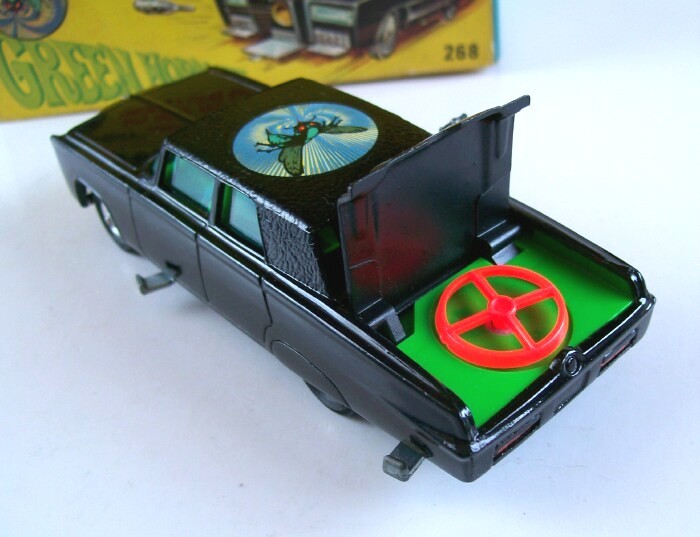
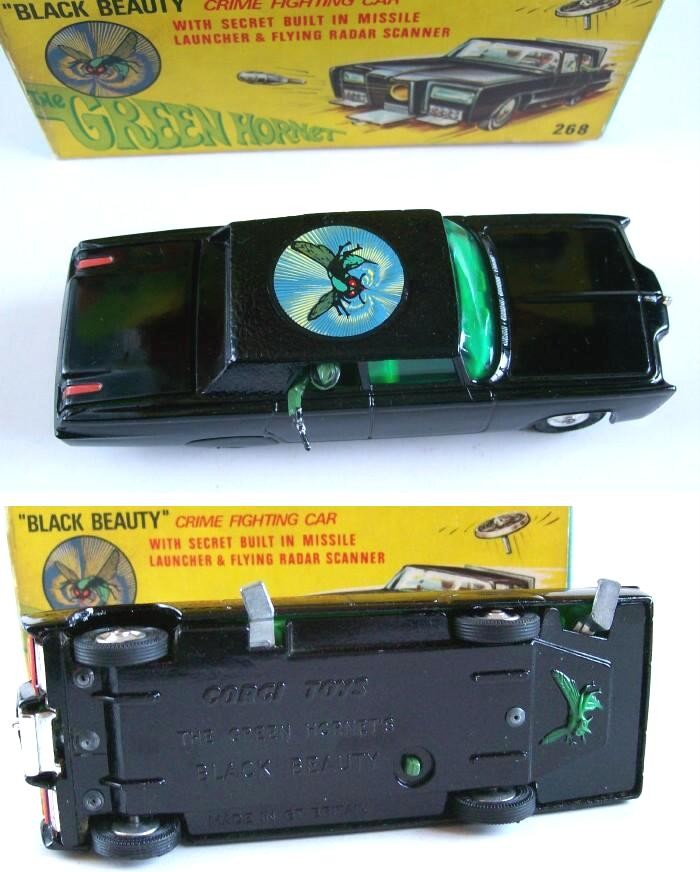
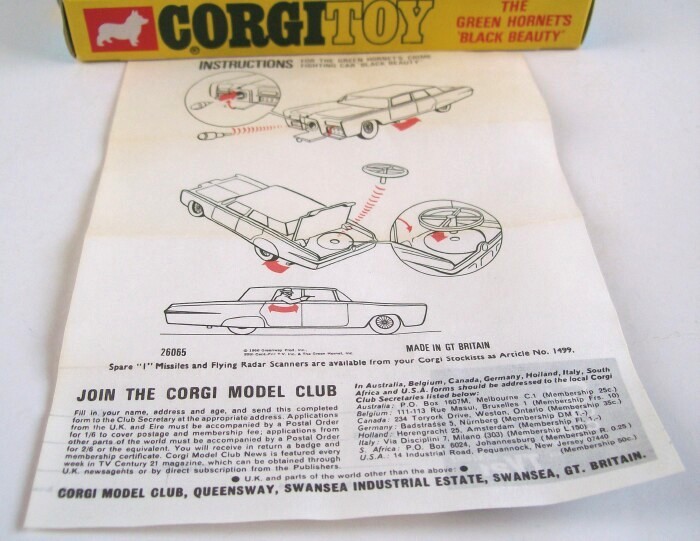
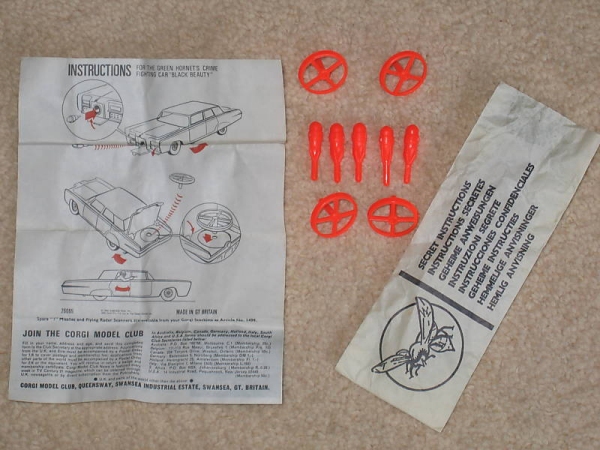
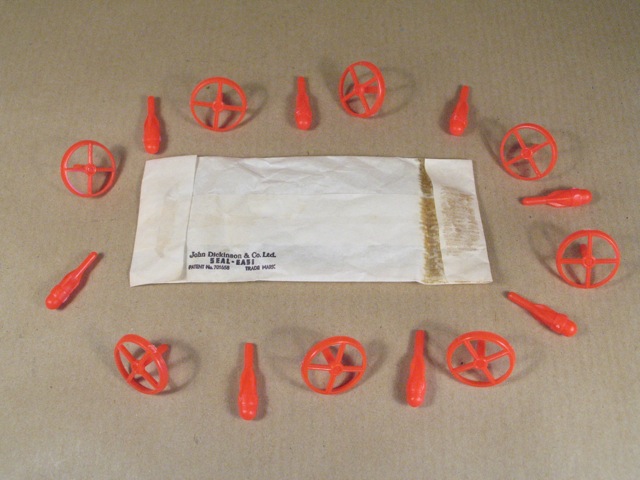
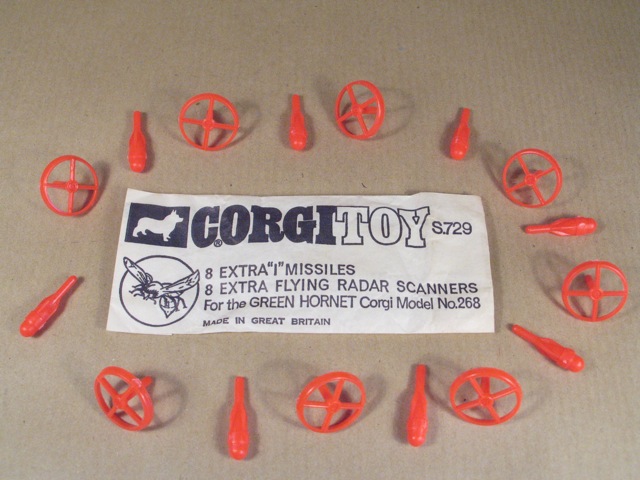
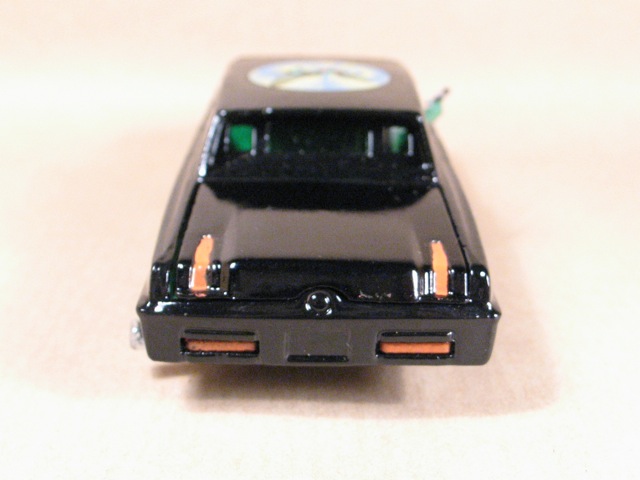
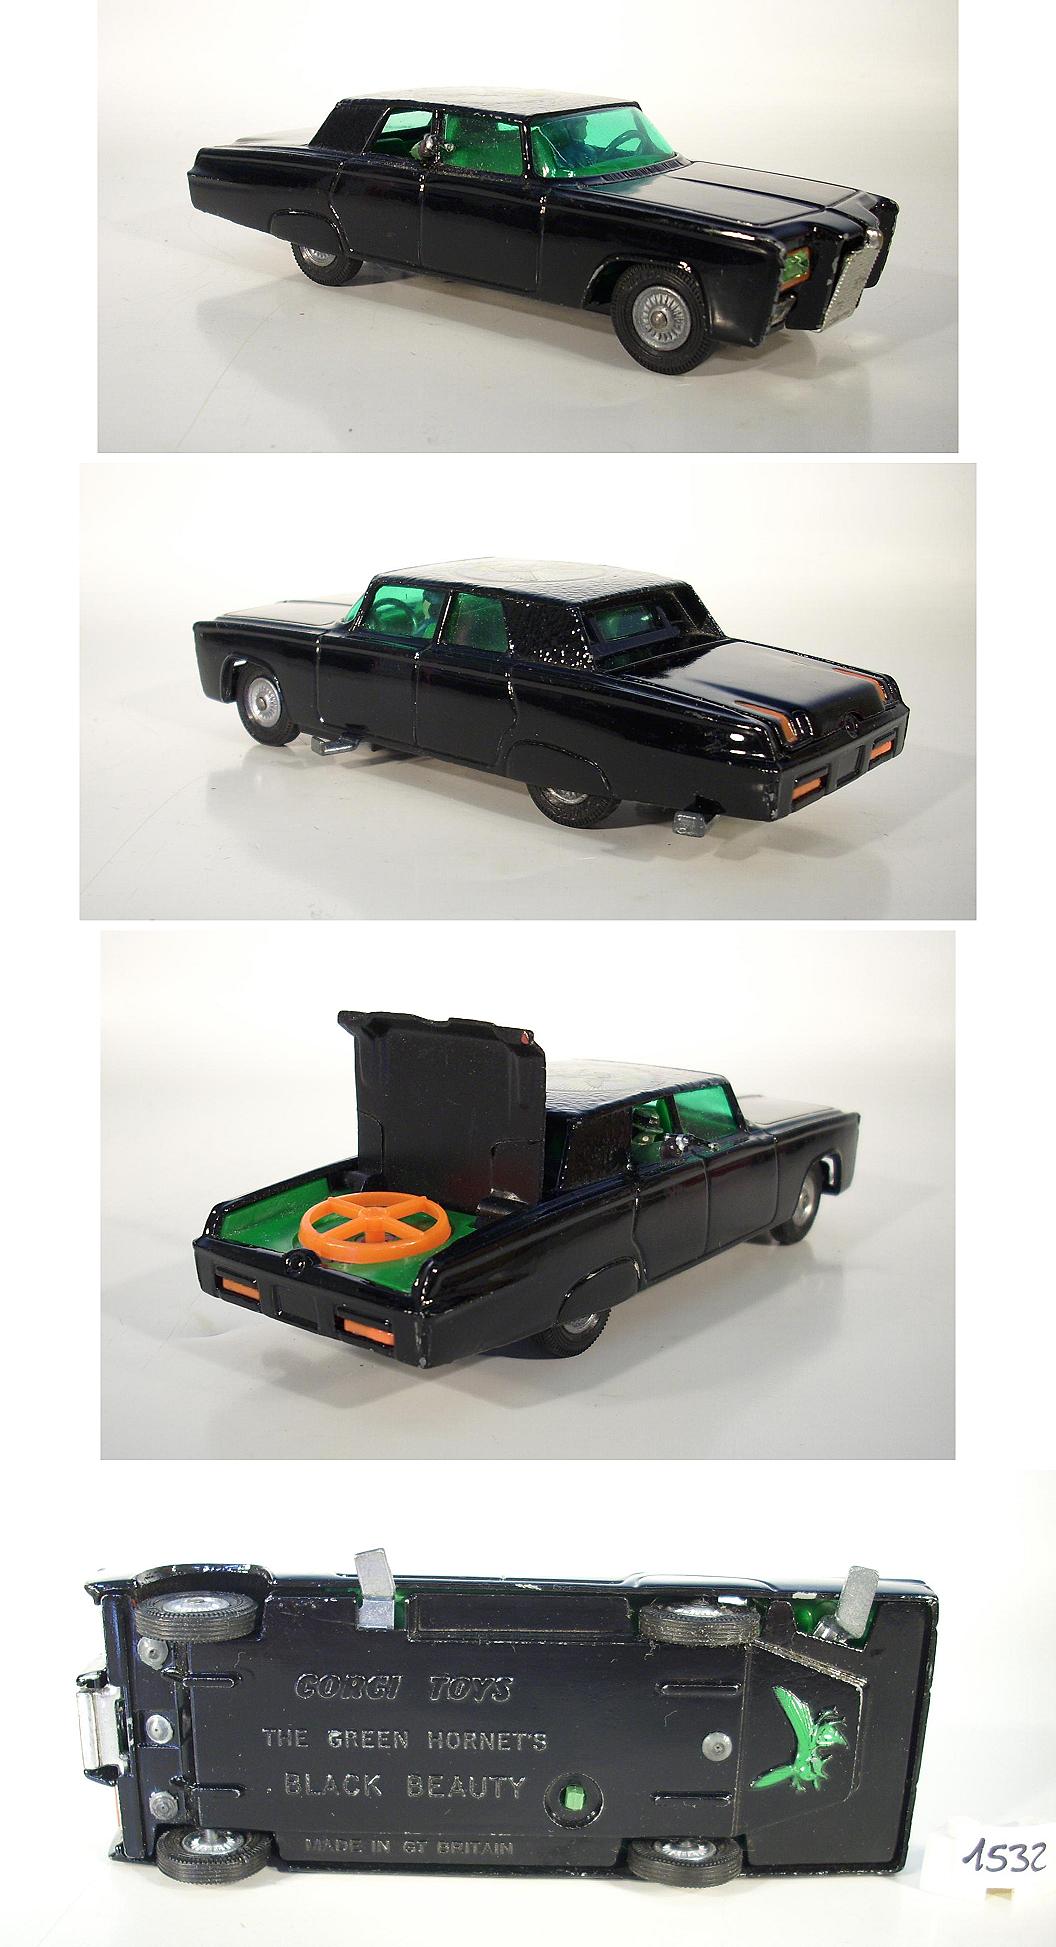
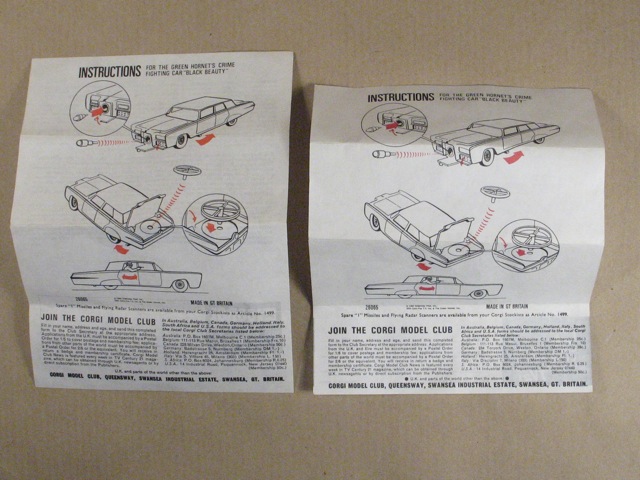
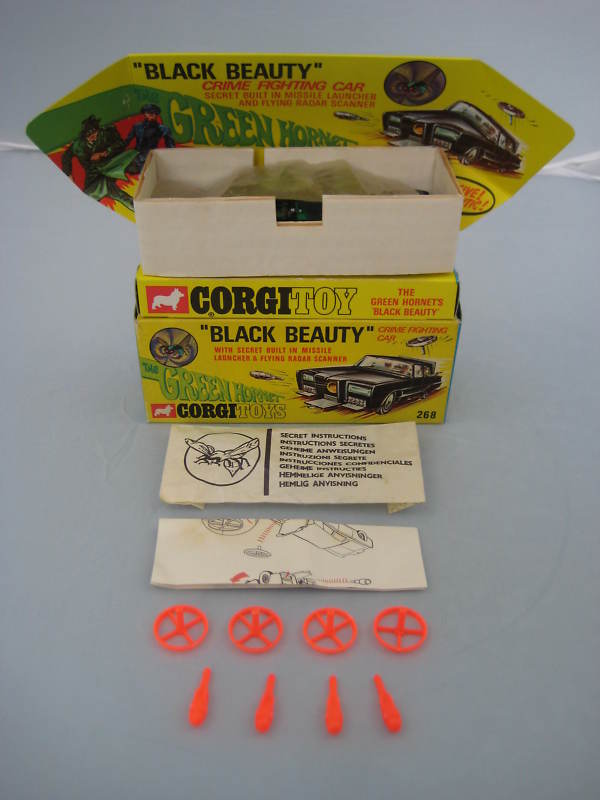
The car is complete and comes with an original missile and flying radar scanner.
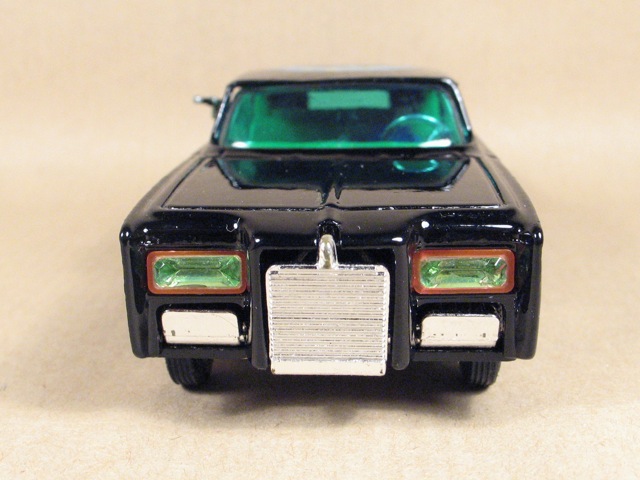
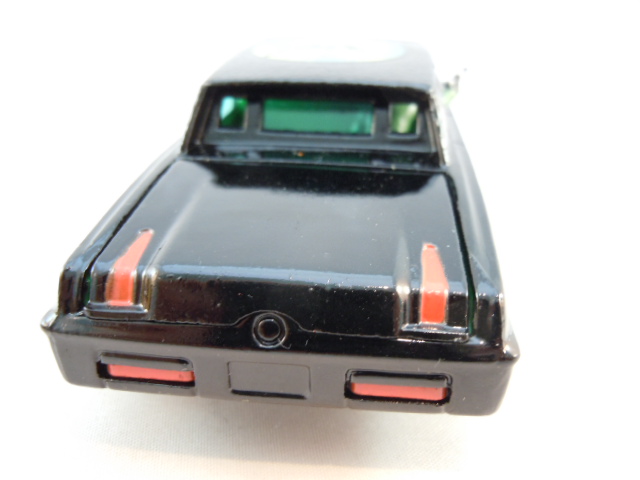
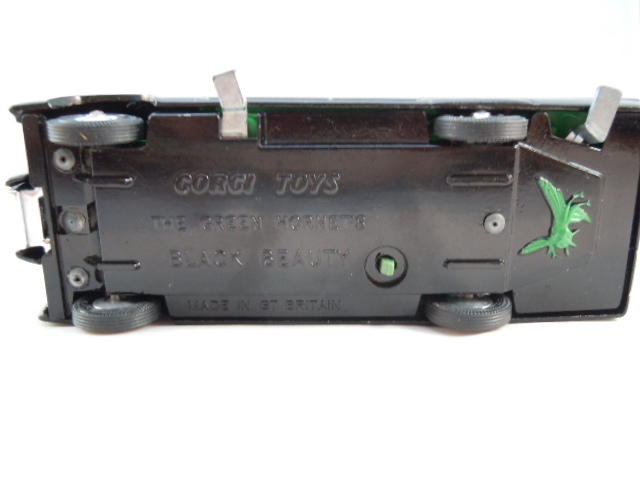
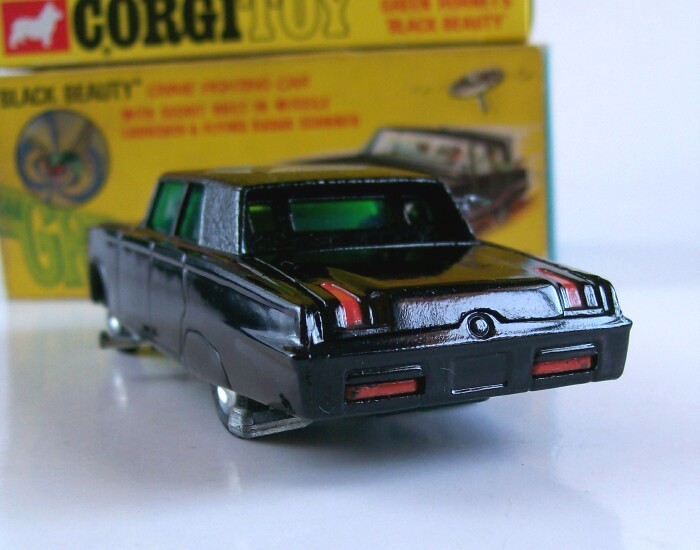
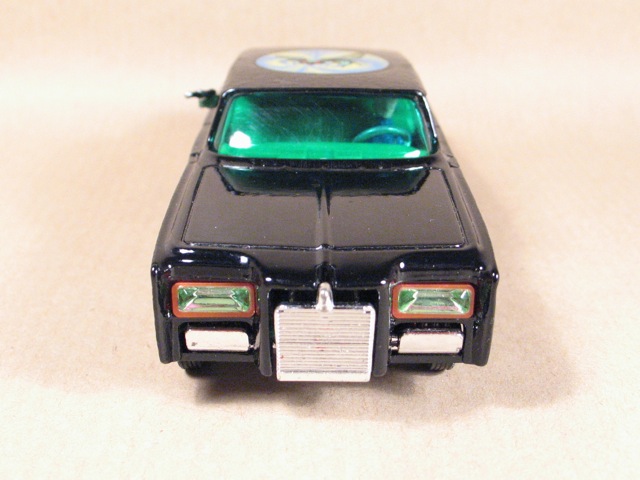
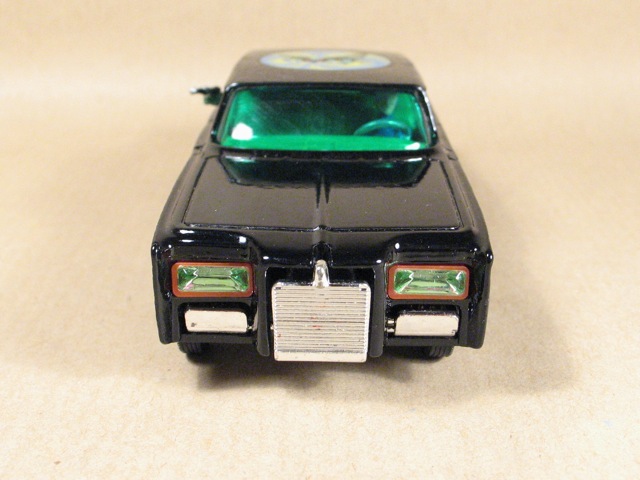
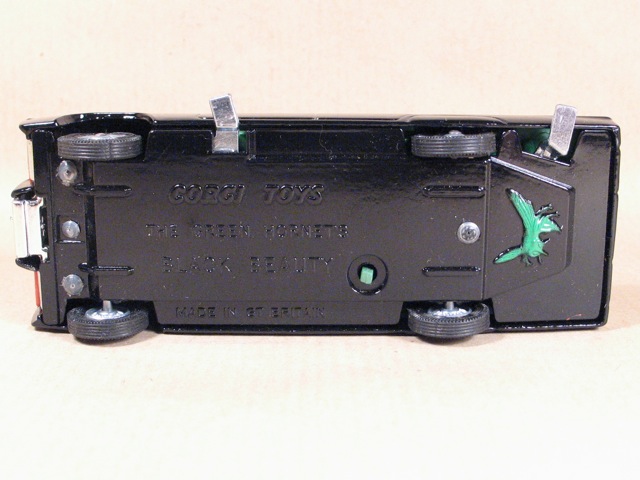
The
front grill mechanism is complete and well chromed. The grill closes and only
has a 1.5mm gap when closed - this is quite rare as most grills gape after
a while due to the plastic inner mechanism bending. The missile is fired by
pressing the front lever on the left hand side and this will fly a good 8-10
feet. The jewelled headlights are both present and undamaged.
To
shut the grill just lift it up and push the front left hand lever fully forward.
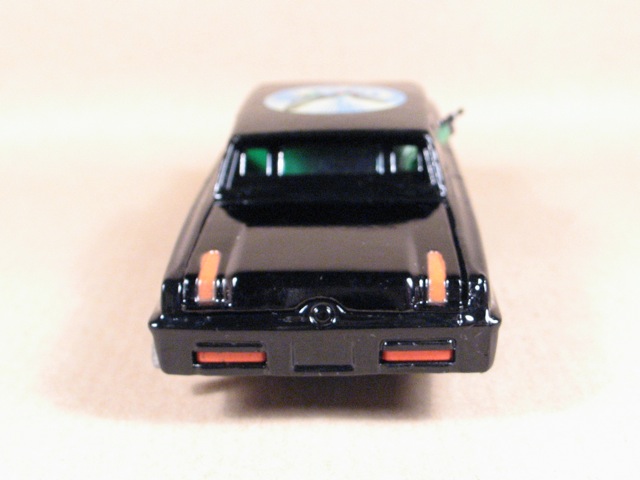
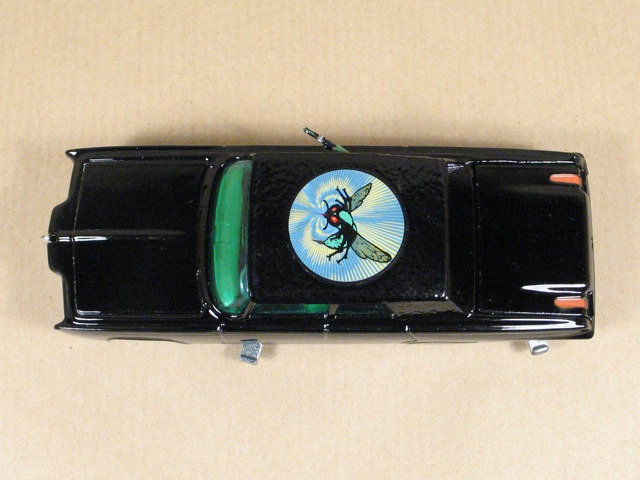
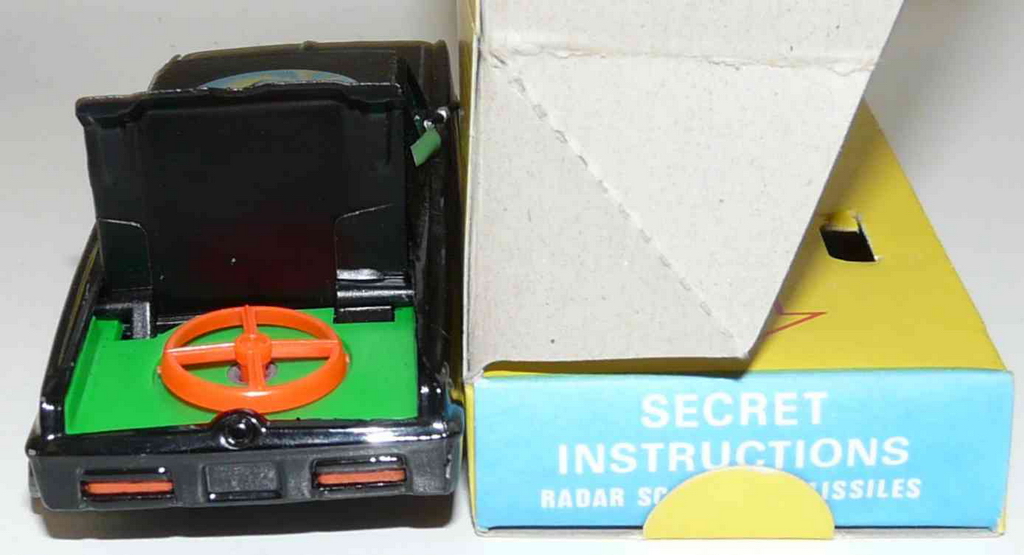
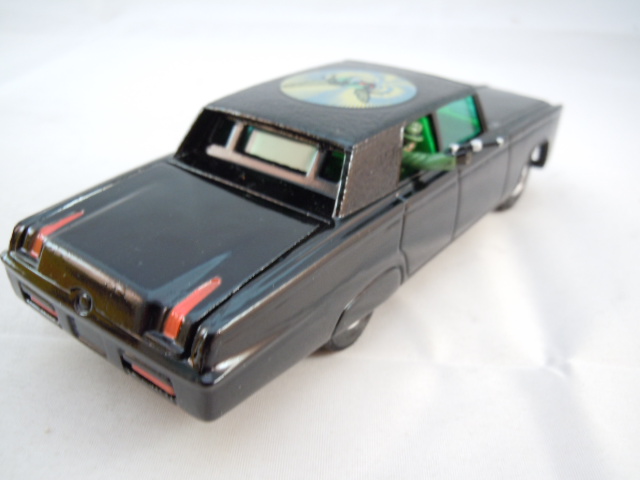
The fying radar scanner is fired by pressing the rear lever. A word of warning
here if you haven't fired one of these before; the lever opens the boot (trunk)
and a further push launches the scanner. Forget Batmobile missiles - this
thing REALLY takes off. Don't look over it when firing - trust me it hurts
like heck when it smacks you in the eye!
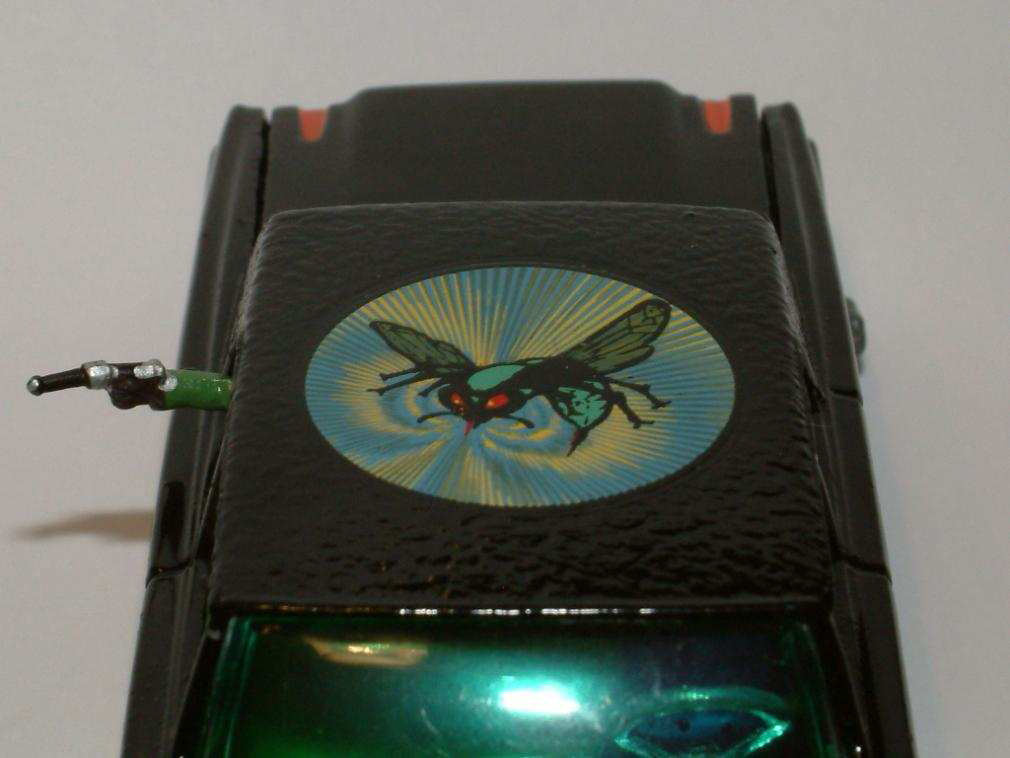
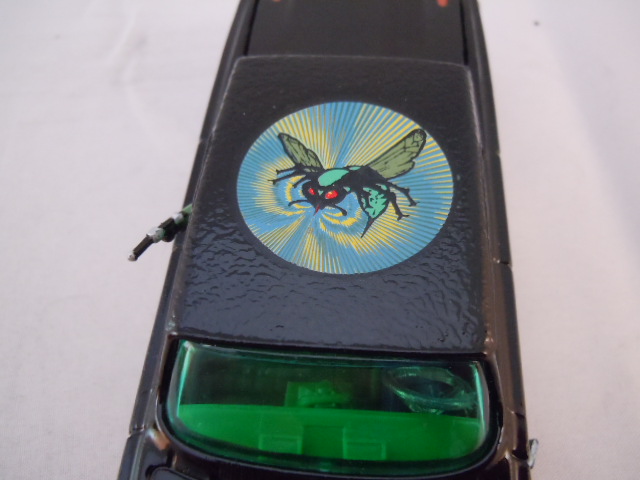
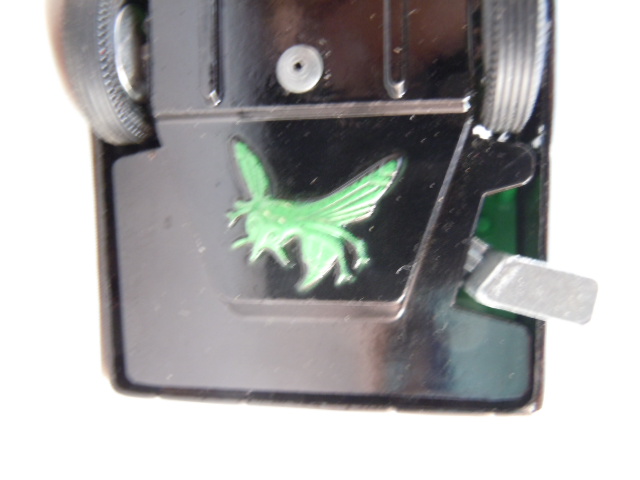
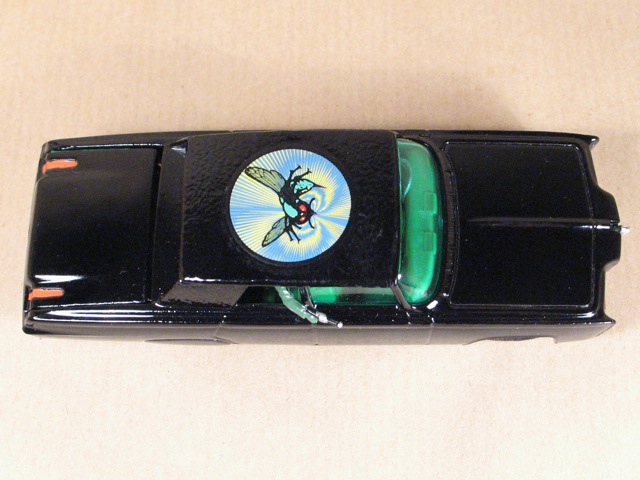
The
tip of the Green hornet's gun is present - very often this breaks off - and
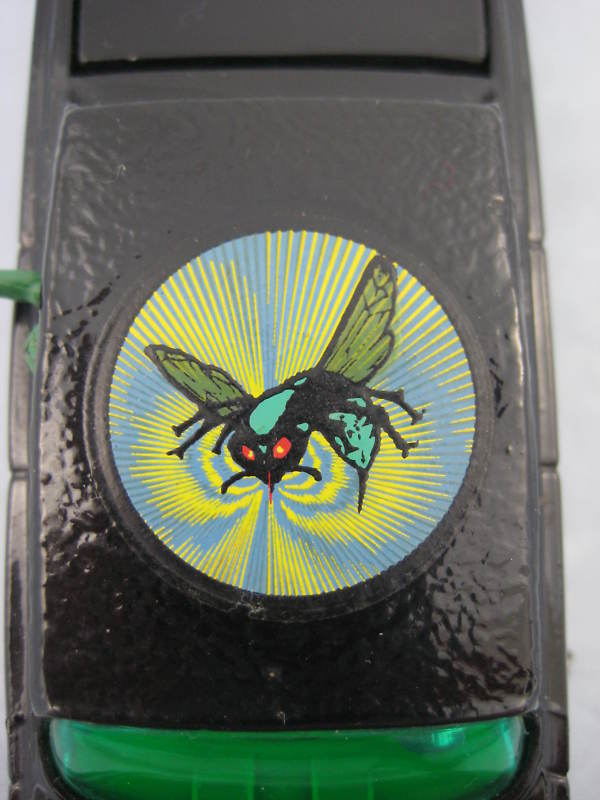
he is securely in place, swivelling correctly. The Hornet transfer is original
and completely undamaged.
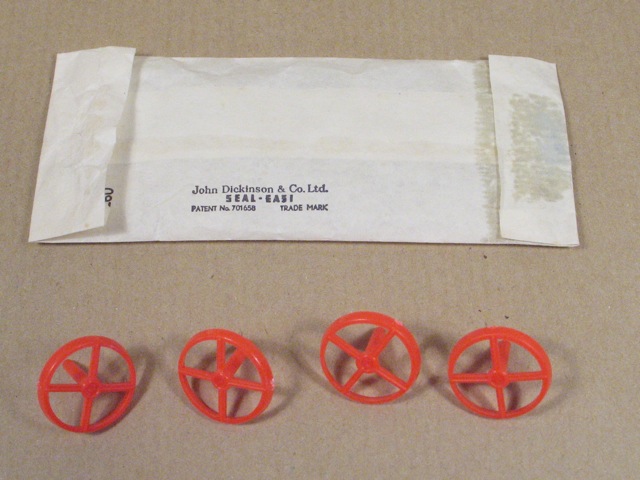
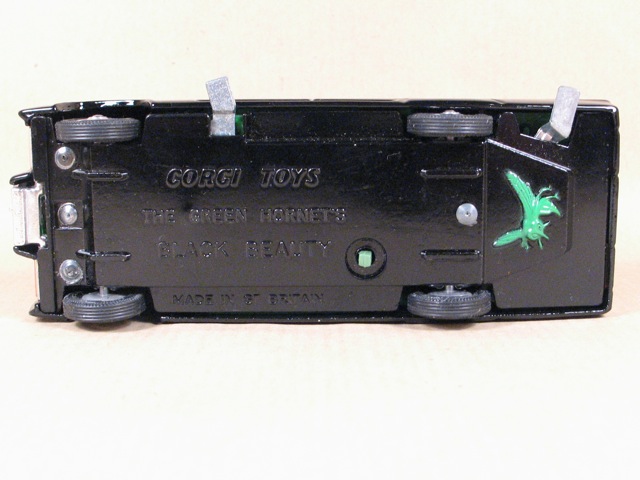
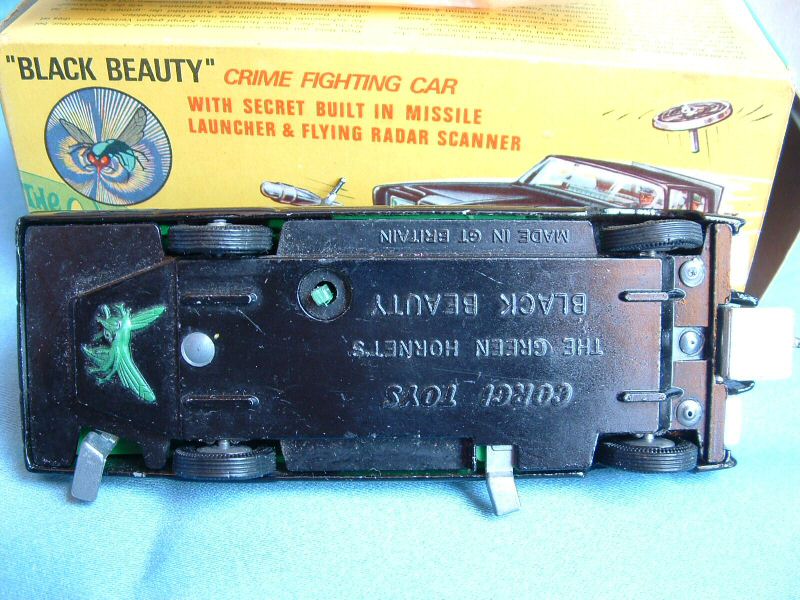
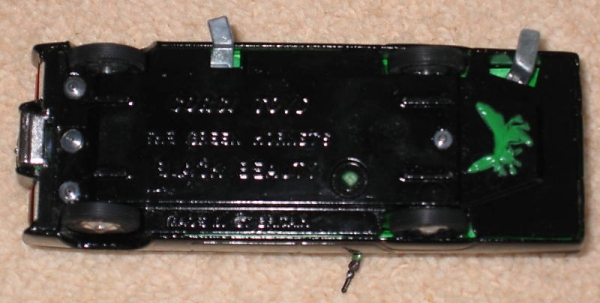
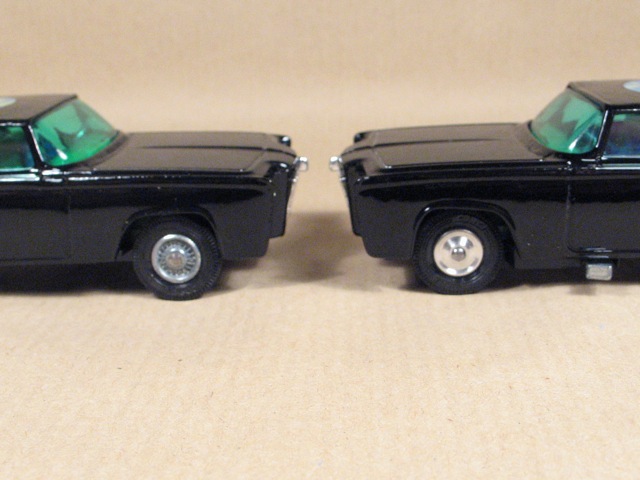
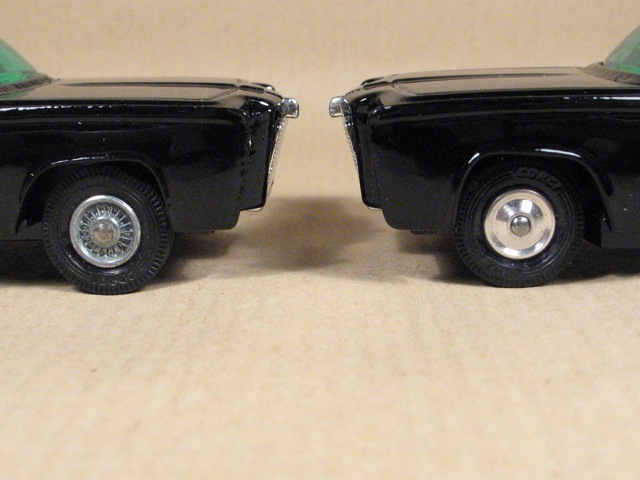
The tyres are as new still showing the tread pattern and are still supple. The spun wheels are also as new.
The paintwork is glossy black.
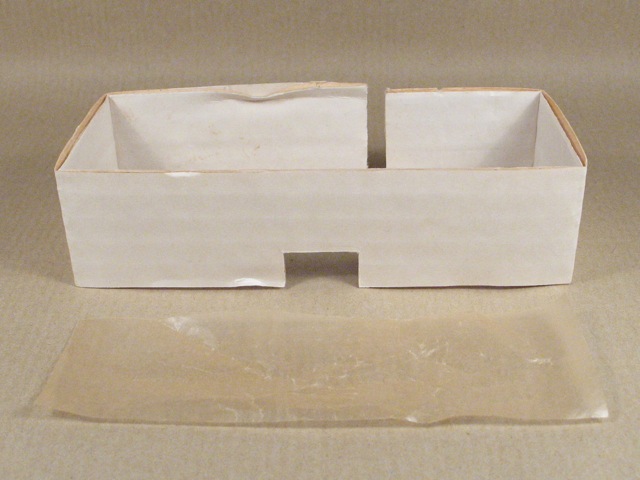
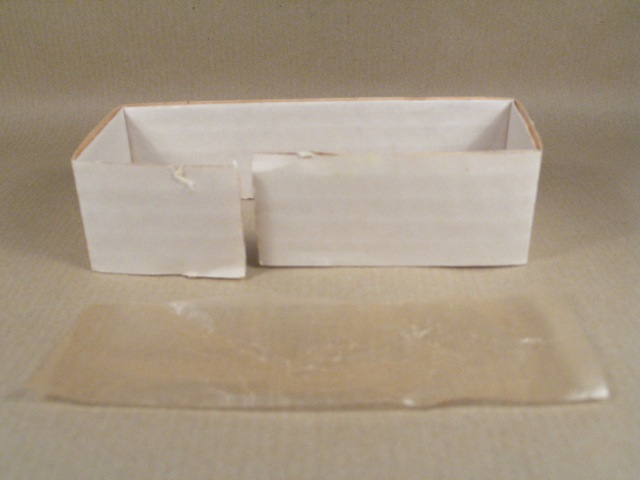
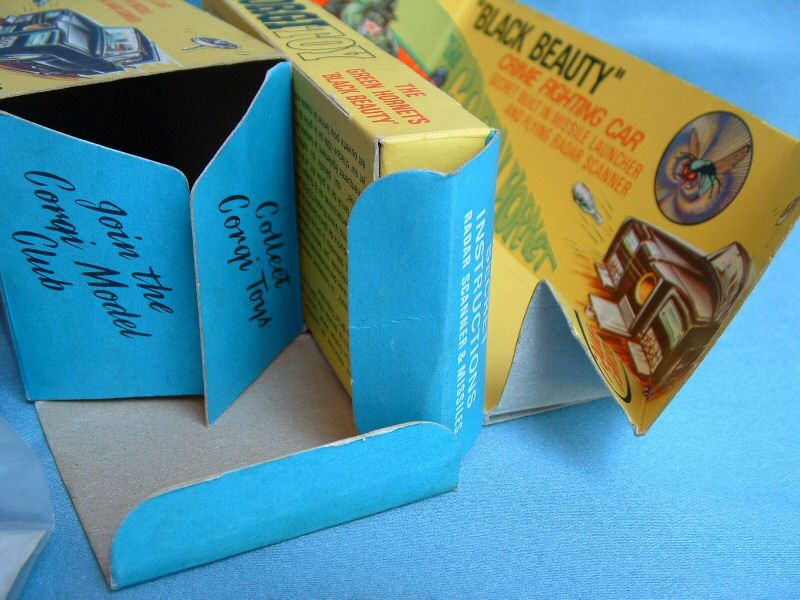
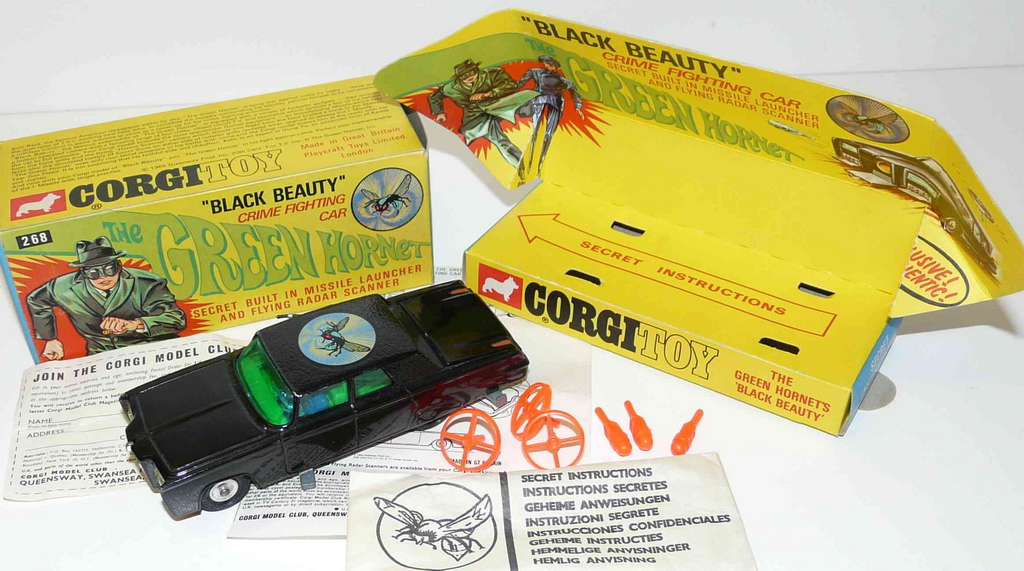
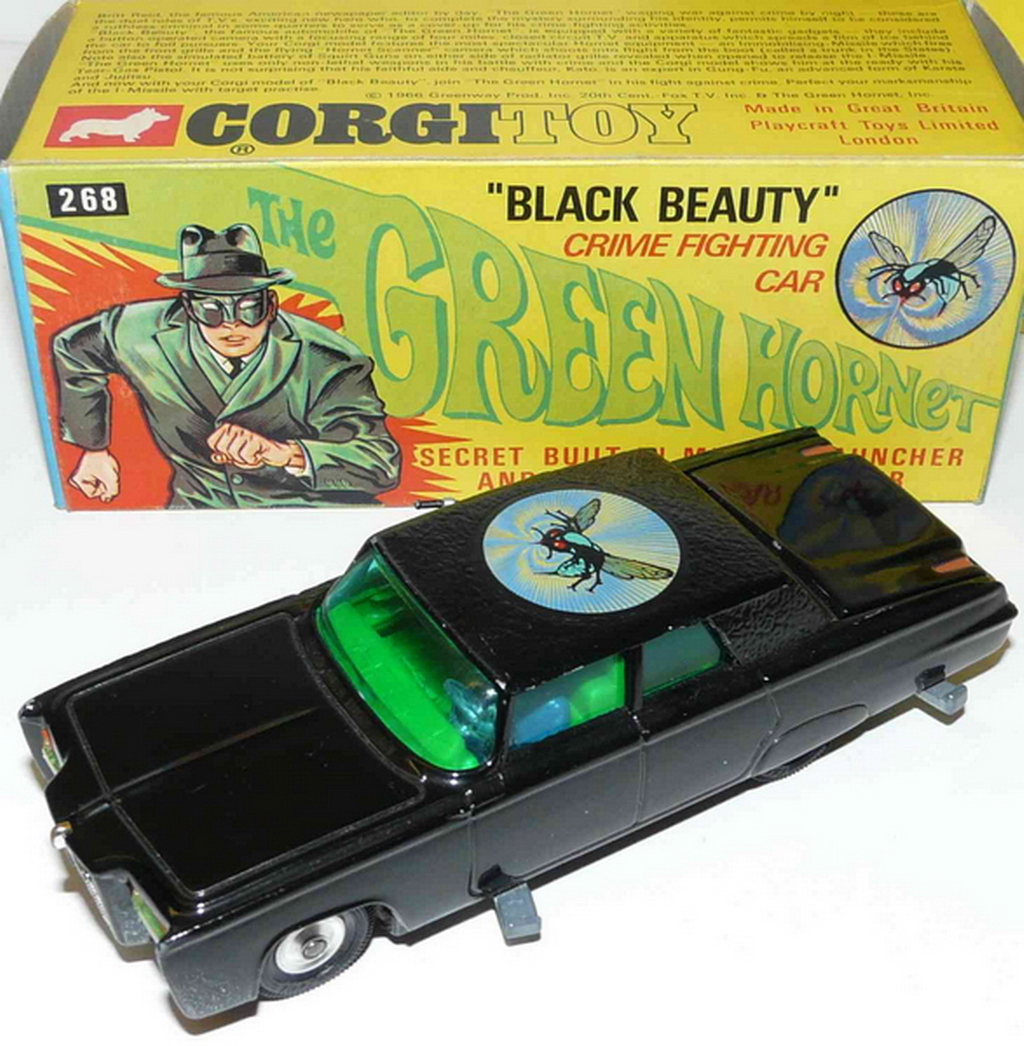
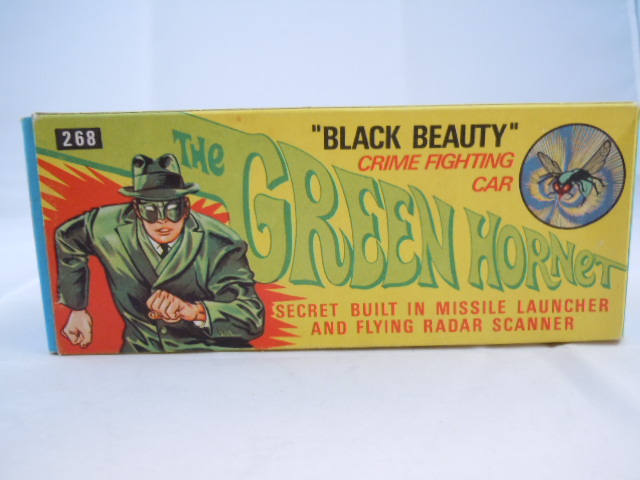
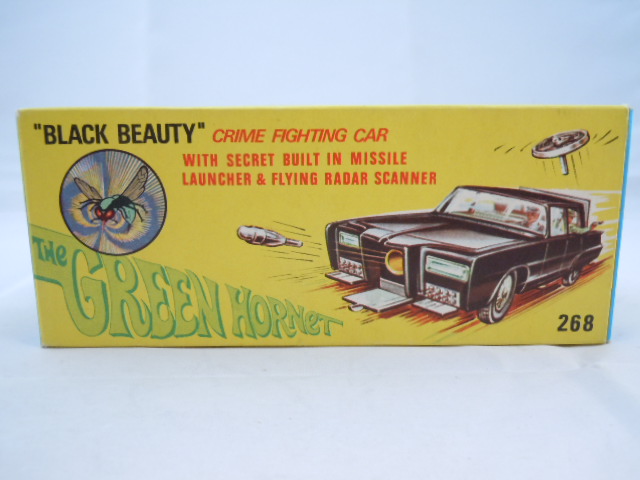
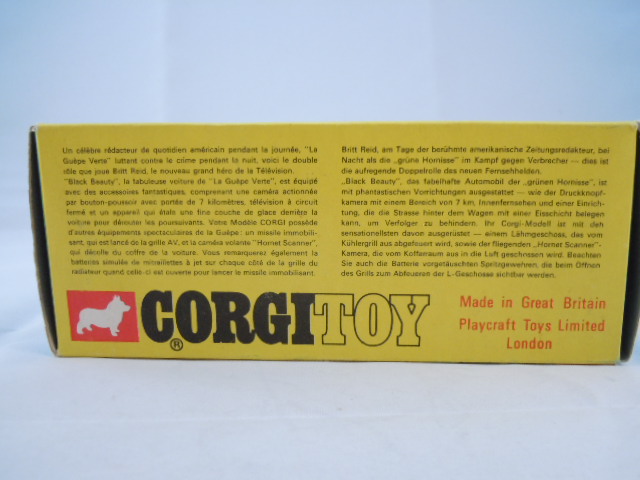
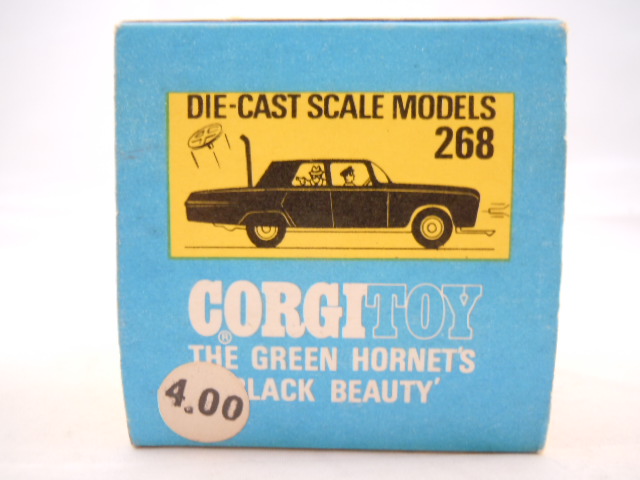
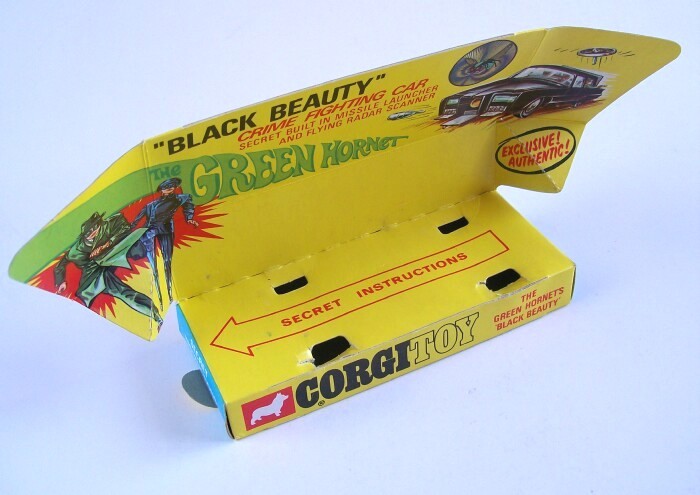
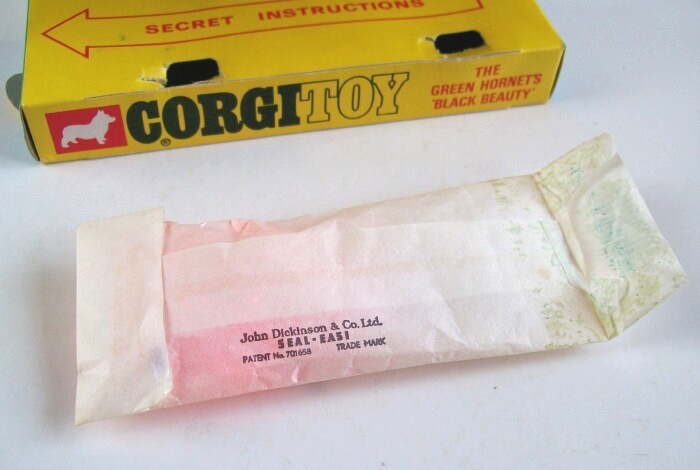
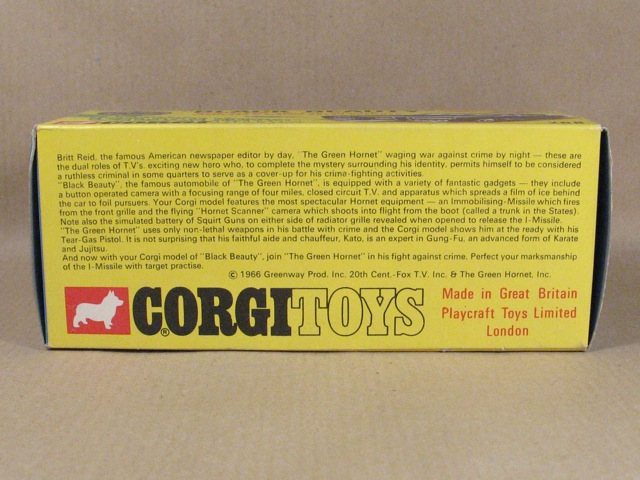
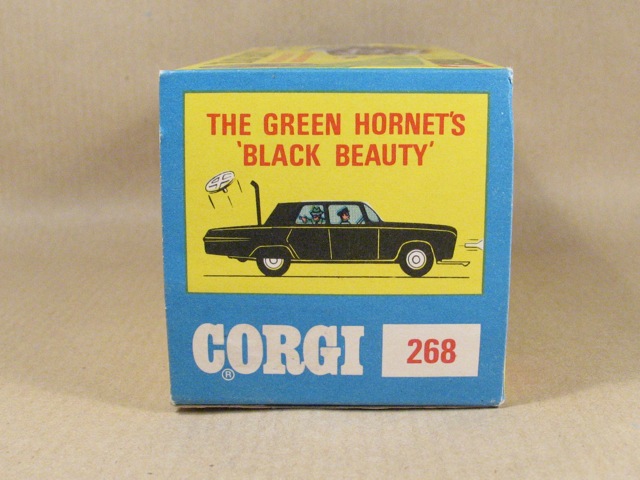
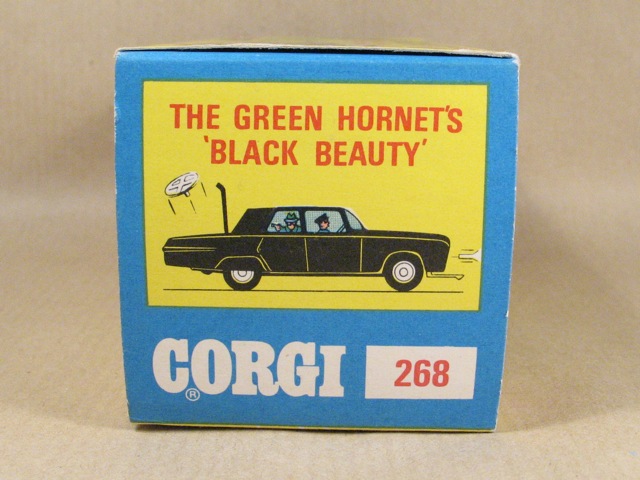
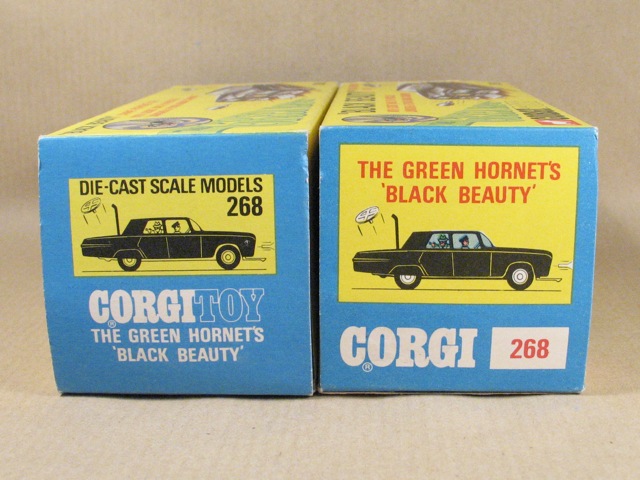
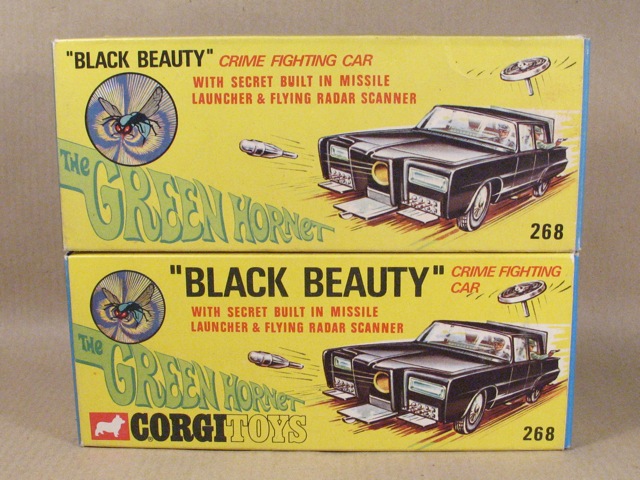
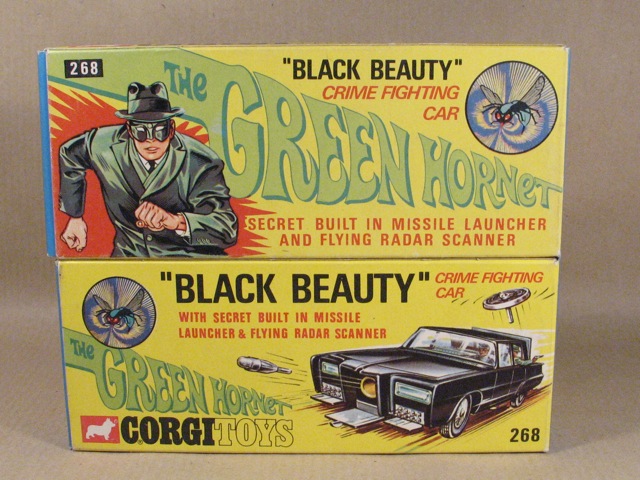
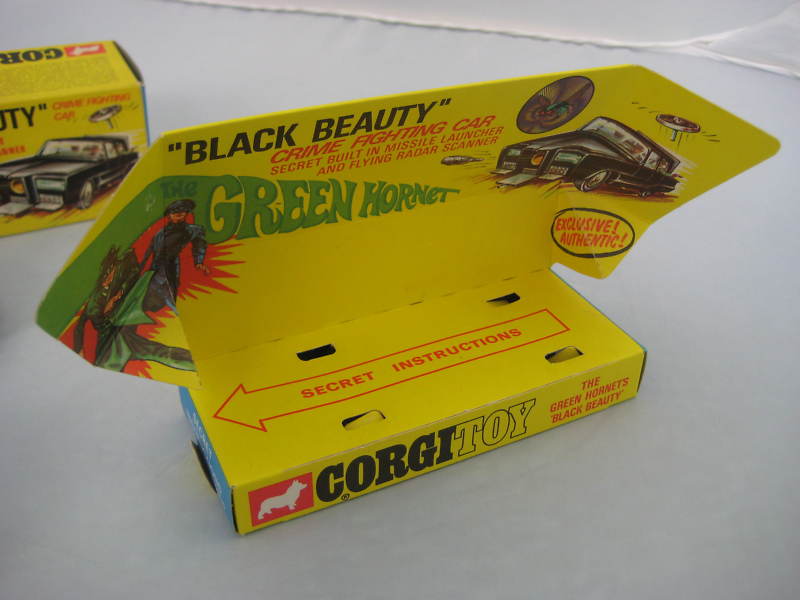
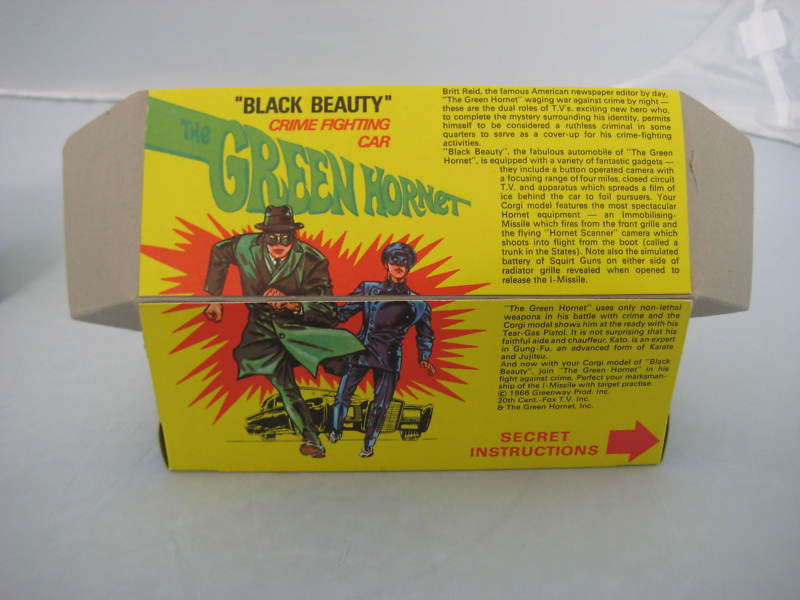
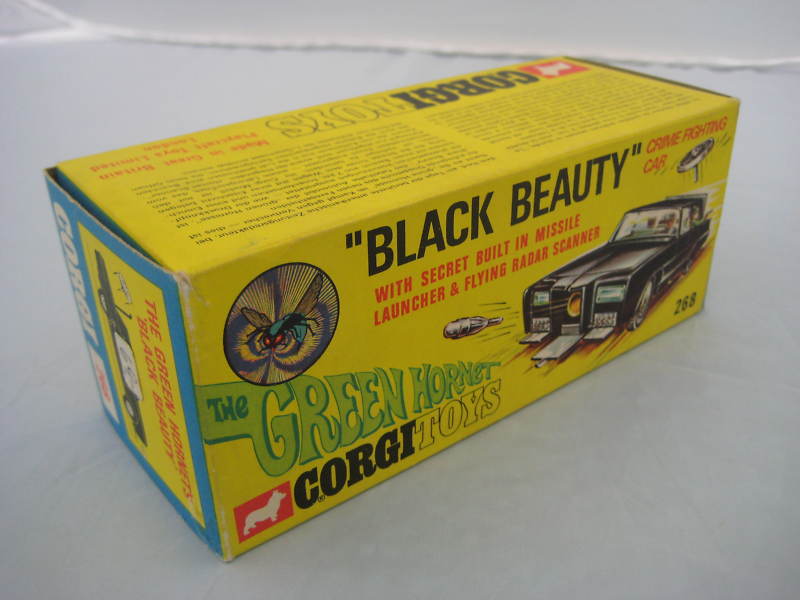
268 FIRST BOX & CAR VERSION
 |
 |
 |
 |
 |
 |
 |
 |
 |
 |
 |
 |
 |
 |
 |
 |
 |
 |
 |
 |
 |
 |
 |
 |
 |
 |
 |
 |
 |
 |
 |
 |
 |
 |
 |
 |
 |
 |
 |
 |
 |
 |
 |
 |
 |
 |
 |
 |
 |
 |
 |
 |
 |
 |
 |
 |
 |
 |
 |
 |
 |
 |
 |
 |
 |
 |
 |
 |
 |
 |
 |
 |
 |
 |
 |
 |
 |
 |
 |
 |
 |
 |
 |
 |
 |
 |
 |
 |
 |
 |
 |
 |
 |
 |
 |
 |
 |
 |
 |
 |
 |
 |
 |
 |
 |
 |
 |
 |
 |
 |
 |
 |
 |
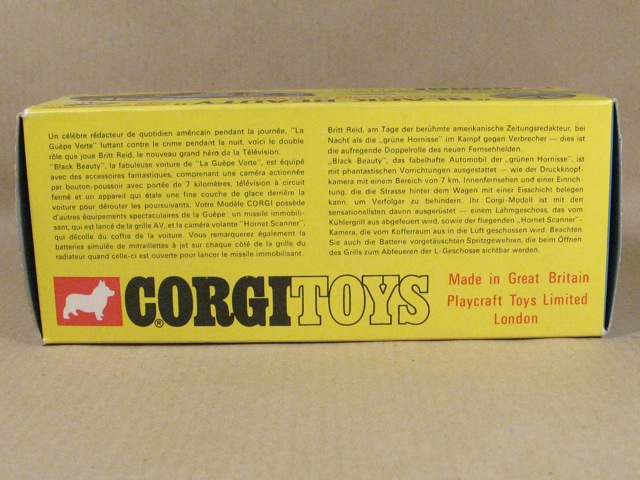
268 SECOND BOX & CAR VERSION
 |
 |
 |
 |
 |
 |
 |
 |
 |
 |
 |
 |
 |
 |
 |
 |
 |
 |
 |
 |
 |
 |
 |
 |
 |
 |
 |
 |
 |
 |
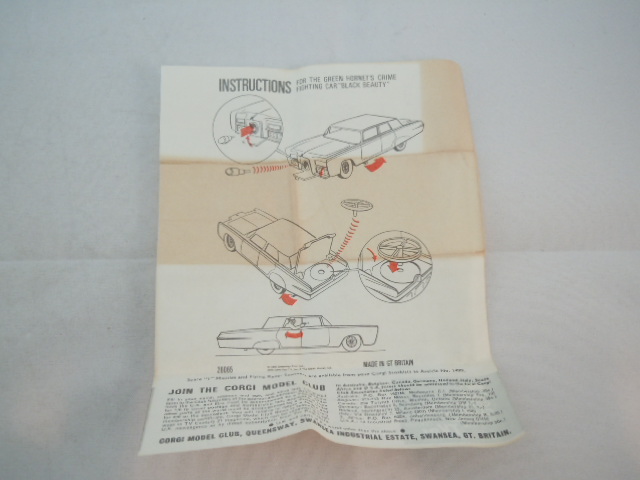
268 DIFFERENCES BETWEEN CARS , BOXES & INSTRUCTIONS
 |
 |
 |
 |
 |
 |
 |
 |
 |
 |
 |
 |
 |
 |
 |
 |
 |
268 SECOND
BOX VERSION
268
FIRST CAR VERSION
 |
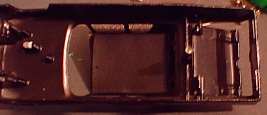
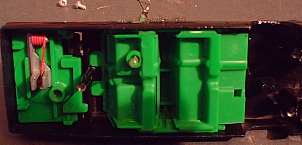
INSIDE CAR
Corgi Toys Green Hornet Restauration
The Green hornet is a little easier to restore than the Batmobile. Not so many working parts. Note that the radiator grill on this model is broken. When drilling out the rivets be very careful to drill central. The pillars inside are very thin and there is very little room for errors.
Drill
out the three rivets 2 at the front and one in the middle. Do this in the
same manner as the batmobile.
DO NOT DRILL OUT THE CENTER RIVET AT THE FRONT !
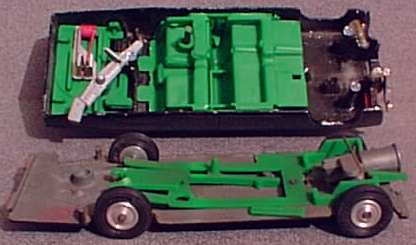
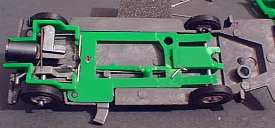
Remove
the base plate. Take note of where the parts are situated.
See the broken suspension piece on the base plate. This can be discarded.
Later I will show how to repair the suspension with spring piano wire.
All
the interior parts removed.
The only repair work to be done on this model is the front suspension as you
will find on most used Green Hornets.
The radiator will have to be replaced
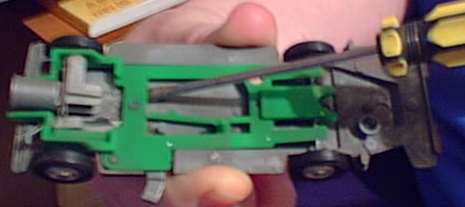
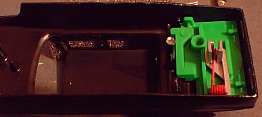
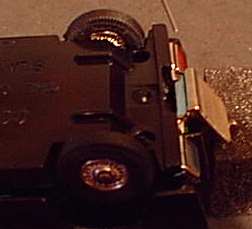
Remove the head lights from the body by gently pushing from inside with a small screw driver.
To
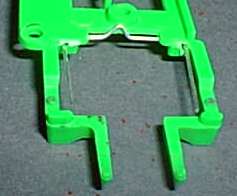
repair the front suspension remove the plastic frame from the baseplate.
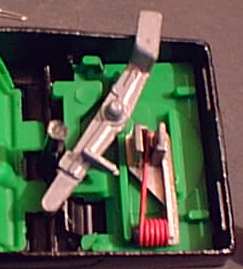
Gently prize off with a small screw driver.
Watch that the two levers under the frame don't fall out.
These are the levers that push down the radiator to fire the front rocket.
With the plastic frame removed note how the two levers are placed.
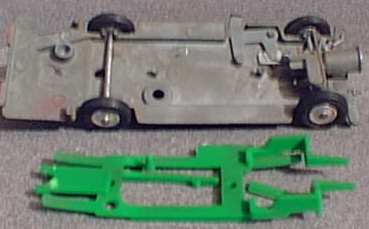
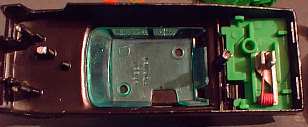
All
the parts are now removed so you can strip the body and base plate of paint.
Take the front tyres off the wheels and mask them off before spraying the
new paintwork.
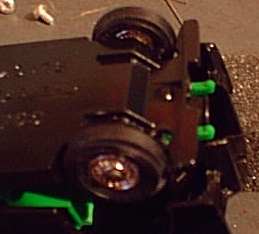
This picture shows the one remaining front suspension.
Brake off the remaining suspension. We are now going to replace it with a much stronger one
This
picture shows the plastic strip that is the return spring for the radiator
button.
This is not a very good spring so I will show how to make this stronger and
do the job it is supposed to do more efficient.
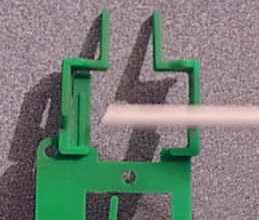
To
fit a new front suspension drill a 1/16inch hole through the plastic frame
central to the broken off part.
Drill at a slight angle.
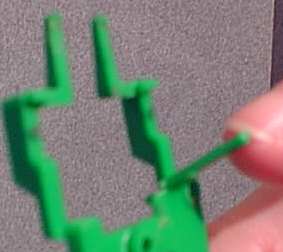
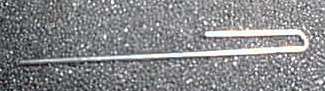
Next
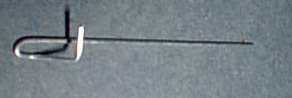
take a piece of 1/32nd piano wire and bend to shape as in the picture.
When making the "V" shape in the center bend back at a slight angle.
Each section is 3/4 inch long.
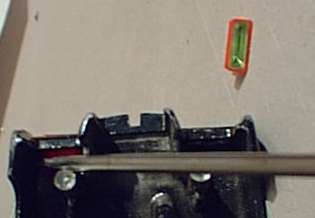
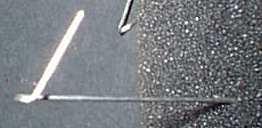
Showing the new front suspension wire in place.
Note
how the "V" section fits round the plastic frame.
This holds the new suspension in place nice and firm.
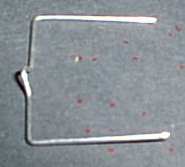
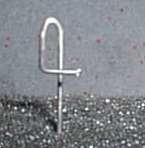
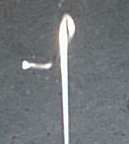
This
part is to strengthen the plastic return arm for the drop down radiator lever.
This is a piece of piano wire 2inch long.Measure 1.5 inch from one end bend
double.
Hold in the pliers 3/16 from the end that is bent back on its self then bend
the short piece out to about 45 degree.
Then measure 1/4 inch from the bend then bend to 90 degree so it crosses the
main part of the spring.
This is what the finished spring should look like.
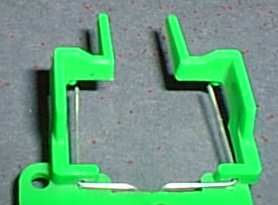
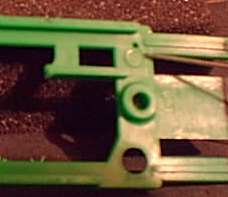
Take the plastic frame.
At the rear end of the frame is the rear suspension arms.
Looking down on the frame from the top you will see a circular mold mark.
At the outer edge of the circle drill a 1/32nd hole.
This is where the new spring is to anchor.
Note on the frame I have used for the photo the plastic return arm is broken
off.
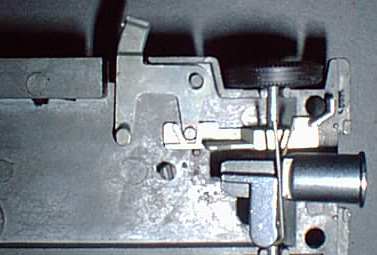
Insert the spring into the frame.
The end of the spring is fed through the hole in the frame from the bottom.
This picture is looking from the top.
This picture is looking from the bottom.
Now
the body and base have been resprayed.
We can put the car back together.
Put the two levers for the radiator in position.
Next fit the plastic frame to the chassis making sure the two levers stay
in position.
Now fit the trunk lid into the body.
Next fit the spinner firing mechanism.
Now fit the windscreen.
Fit the seating making sure that the Green Hornets hand goes through the window.
Now fit the lever that operates the trunk lid.
Make sure that the lever is forward of the tab which is part of the trunk
lid.
The trunk should open when this lever is pushed forward to the front of the
car.
Now fit the base plate entering the two lugs on the back into the two holes
in the rear body panel.
Fit the radiator on top of the two green frame ends you can see these in the
previous picture.
Now close the base plate to the body trapping the radiator.
I use self tapping screws to hold the base plate.
The reason for this is that the tightness of the two screws determines whether
the radiator stays closed.
This is the problem why most radiators hang slightly open.
The rivets on an original are always a little loose to allow the radiator
to drop when you press the button.
This can be adjusted by using the screws.
Now fit the head lights.
Check that the trunk mechanism functions correctly.
Check the radiator drops and stays closed.
If it doesn't tighten the two front screws or loosen as the case may be.
Now you have a beautiful Green Hornet you can be proud of owning.
 |
 |
 |
 |
 |
 |
 |
 |
 |
 |
 |
 |
 |
 |
 |
 |
 |
 |
 |
 |
 |
 |
 |
 |
 |
 |
 |
 |
 |
 |
 |
 |
 |
 |